Cottage cheesecake? I know, I know—it sounds a little wild at first. I thought the same thing! But trust me, this recipe completely changed my mind about what a cheesecake can be. I was trying to create a dessert that felt like a real treat but wouldn’t leave me feeling heavy, and that’s when I discovered the magic of blending cottage cheese. It gives you this incredibly creamy, Cottage Cheese Cheesecake that’s packed with protein and just sweet enough with honey.
My family couldn’t believe it wasn’t the full-fat, sugar-loaded version. It’s honestly so simple to make with just a blender and a few good ingredients, and the results are unbelievably satisfying. You get that classic cheesecake experience without any of the guilt, which is a total win in my book.
Why You’ll Love This Cottage Cheese Cheesecake
Honestly, I love this recipe because it feels like I’m cheating, but I’m not. It’s the dessert that lets me have my cake and eat it too, without the sugar crash or the heavy feeling.
- Each slice gives you a serious protein boost that keeps you satisfied for hours, not minutes.
- It’s naturally sweetened with honey, so you get a clean sweetness without any refined sugar.
- The texture is magically creamy and smooth—no one will guess the secret ingredient is cottage cheese!
- It comes together so easily, especially if you’re already a fan of simple blender recipes like my Easy Egg White Bites or Cottage Cheese Banana Pudding.
- It’s the perfect treat for when you want something delicious that still fits into your healthy routine.
Ingredients for Your Cottage Cheese Cheesecake
This is one of those recipes where the quality of your cottage cheese and Greek yogurt really matters. I’ve found that a good brand of low-fat cottage cheese (I won’t name names, but you know the one with the curds that aren’t too big) blends up the smoothest. And trust me, you want that filling silky!
For the Crust:
- 1 cup old fashioned oats
- 2 tablespoons honey (warmed to liquid if it’s crystallized)
- 1 tablespoon melted butter
For the Filling:
- 3 cups low fat cottage cheese
- 1 cup plain Greek yogurt
- 3 large eggs
- 1/3 cup honey
- 1 teaspoon vanilla extract
- 2 tablespoons cornstarch (this is your structure superstar, don’t skip it)
- 1 tablespoon fresh lemon juice
- 1/4 teaspoon kosher salt
How to Make Cottage Cheese Cheesecake
I promise, this isn’t as fussy as a traditional cheesecake. The key is getting that filling super smooth in the blender—it makes all the difference between good and “wow, you made this?” level amazing.
Step 1: First things first, get your oven ready. Crank it to 325°F. Then, take your 8-inch springform pan and give it a very light grease. I just run a tiny bit of butter on a paper towel around the bottom and sides. Cut a circle of parchment paper to fit the bottom and press it in there. This little step is a lifesaver for getting your cheesecake out in one perfect piece later.
Step site 2: Let’s make the crust! Dump your old fashioned oats into a food processor and pulse them until they look like coarse, sandy crumbs. You don’t want big oat pieces. Pour those crumbs into a bowl and stir in the 2 tablespoons of honey and the melted butter. It’ll be a little crumbly, but that’s perfect.
Step 3: Now, press that oat mixture firmly and evenly into the bottom of your prepared pan. I use the bottom of a measuring cup to really pack it down. Pop it in the oven for just 8 minutes. This pre-bakes the crust so it holds up against the wet filling. Take it out and let it cool on the counter for a few minutes while you make the magic happen.
Step 4: Here’s where the blender becomes your best friend. Add everything for the filling—the cottage cheese, Greek yogurt, eggs, 1/3 cup honey, vanilla, cornstarch, lemon juice, and salt—right into the blender pitcher. Now, blend. And I mean blend until it’s completely, utterly smooth. No lumps, no graininess. This might take a full minute or two. Scrape down the sides once to make sure. You want it looking like a super creamy, pale milkshake.
Step 5: Pour that gorgeous, smooth filling right over your slightly cooled crust. Gently tap the pan on the counter a couple times to release any big air bubbles, then smooth the top with a spatula.
Step 6: Bake it for 45 to Fifty minutes. You’re looking for the edges to be completely set and the center to still have a slight wobble when you gently shake the pan—like a firm jiggle, not a liquid slosh. This is the doneness sweet spot! Overbaking is the enemy of creamy cheesecakes, even protein-packed ones like this or my Greek Yogurt Brownies.
Step 7: This next part is crucial for preventing cracks. When the timer goes off, turn the oven OFF. Crack the oven door open just an inch or two (I stick a wooden spoon in the door to hold it). Let the cheesecake sit in there, in the turned-off oven, for 15 minutes. This lets it cool down slowly and gently.
Step 8: After its oven nap, take the cheesecake out and let it cool completely on your stovetop or counter to room temperature. This might take an hour or so. Then—and this is non-negotiable for the right texture—cover it and refrigerate for at least 6 hours, but overnight is absolutely best. It firms up perfectly and the flavors all come together. Trust me, the wait is worth it.
Essential Tips for the Perfect Cottage Cheese Cheesecake
For the absolute smoothest filling, a high-powered blender is your MVP. It breaks down the cottage cheese curds completely. If yours isn’t super powerful, just blend for an extra minute and scrape the sides down twice.
Don’t rush the cooling! Letting it cool slowly in the turned-off oven and then completely at room temperature before chilling helps the structure set without stressing and cracking. It’s the secret to a gorgeous top.
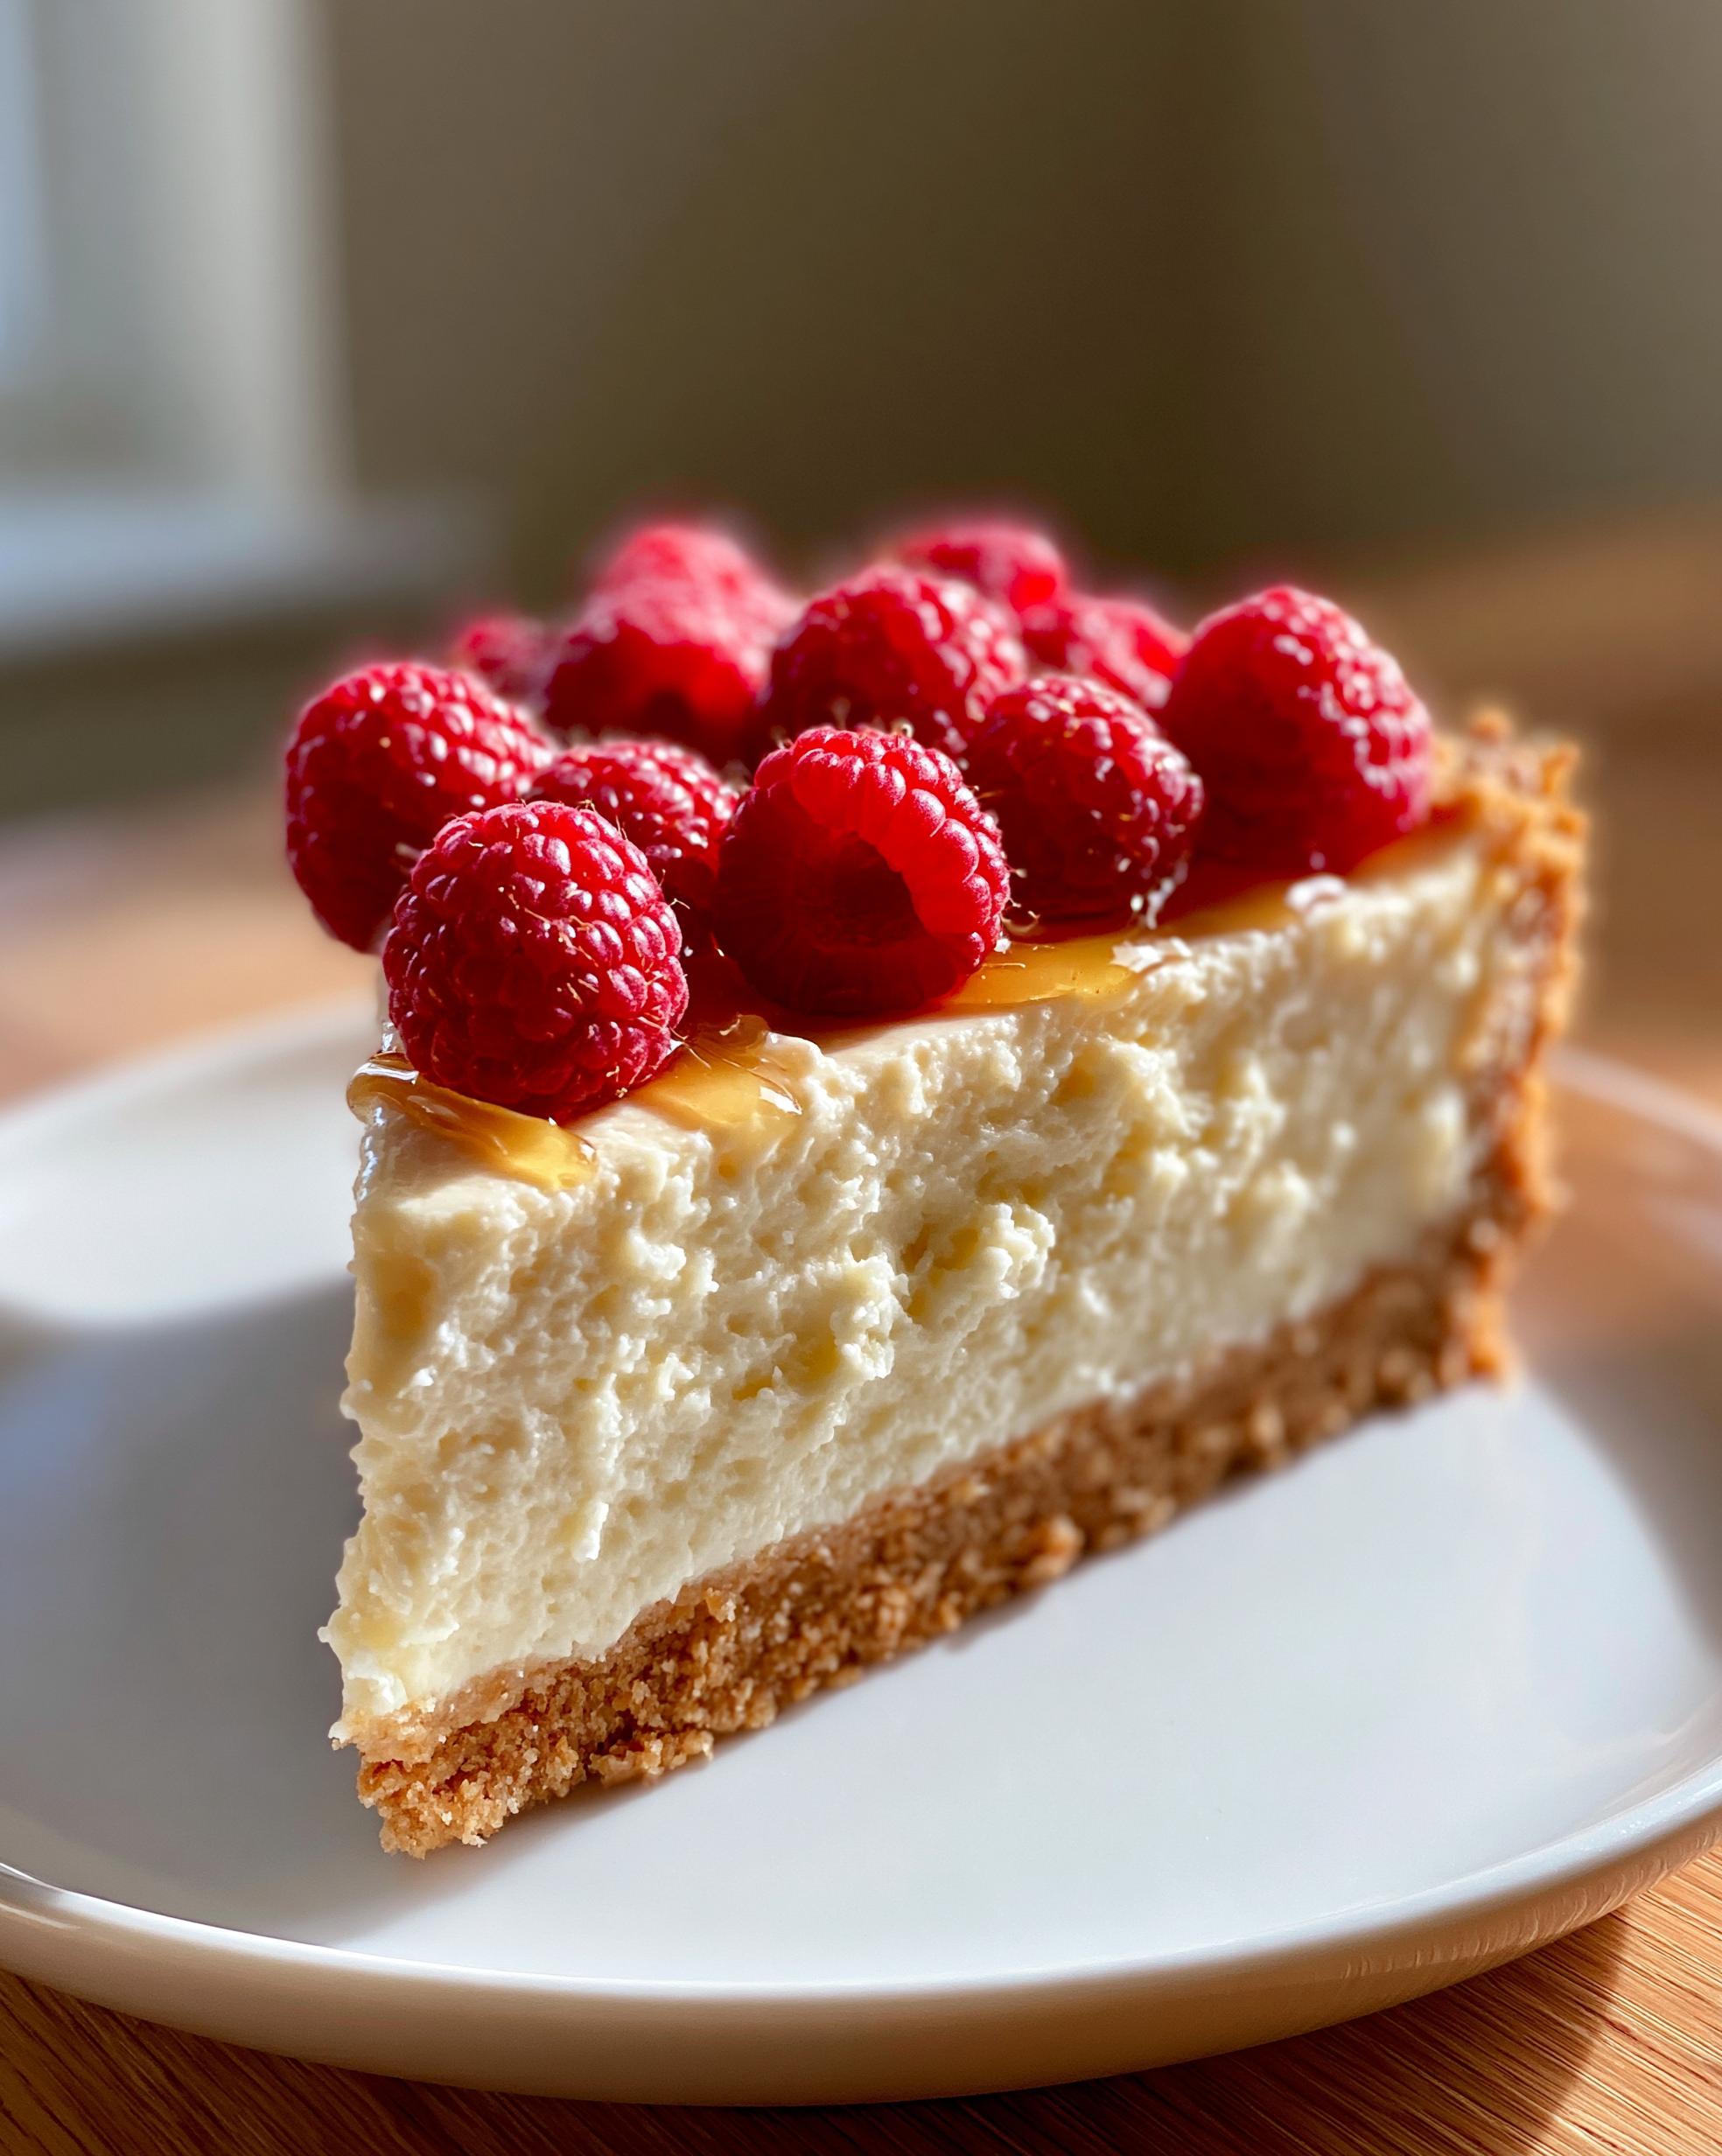
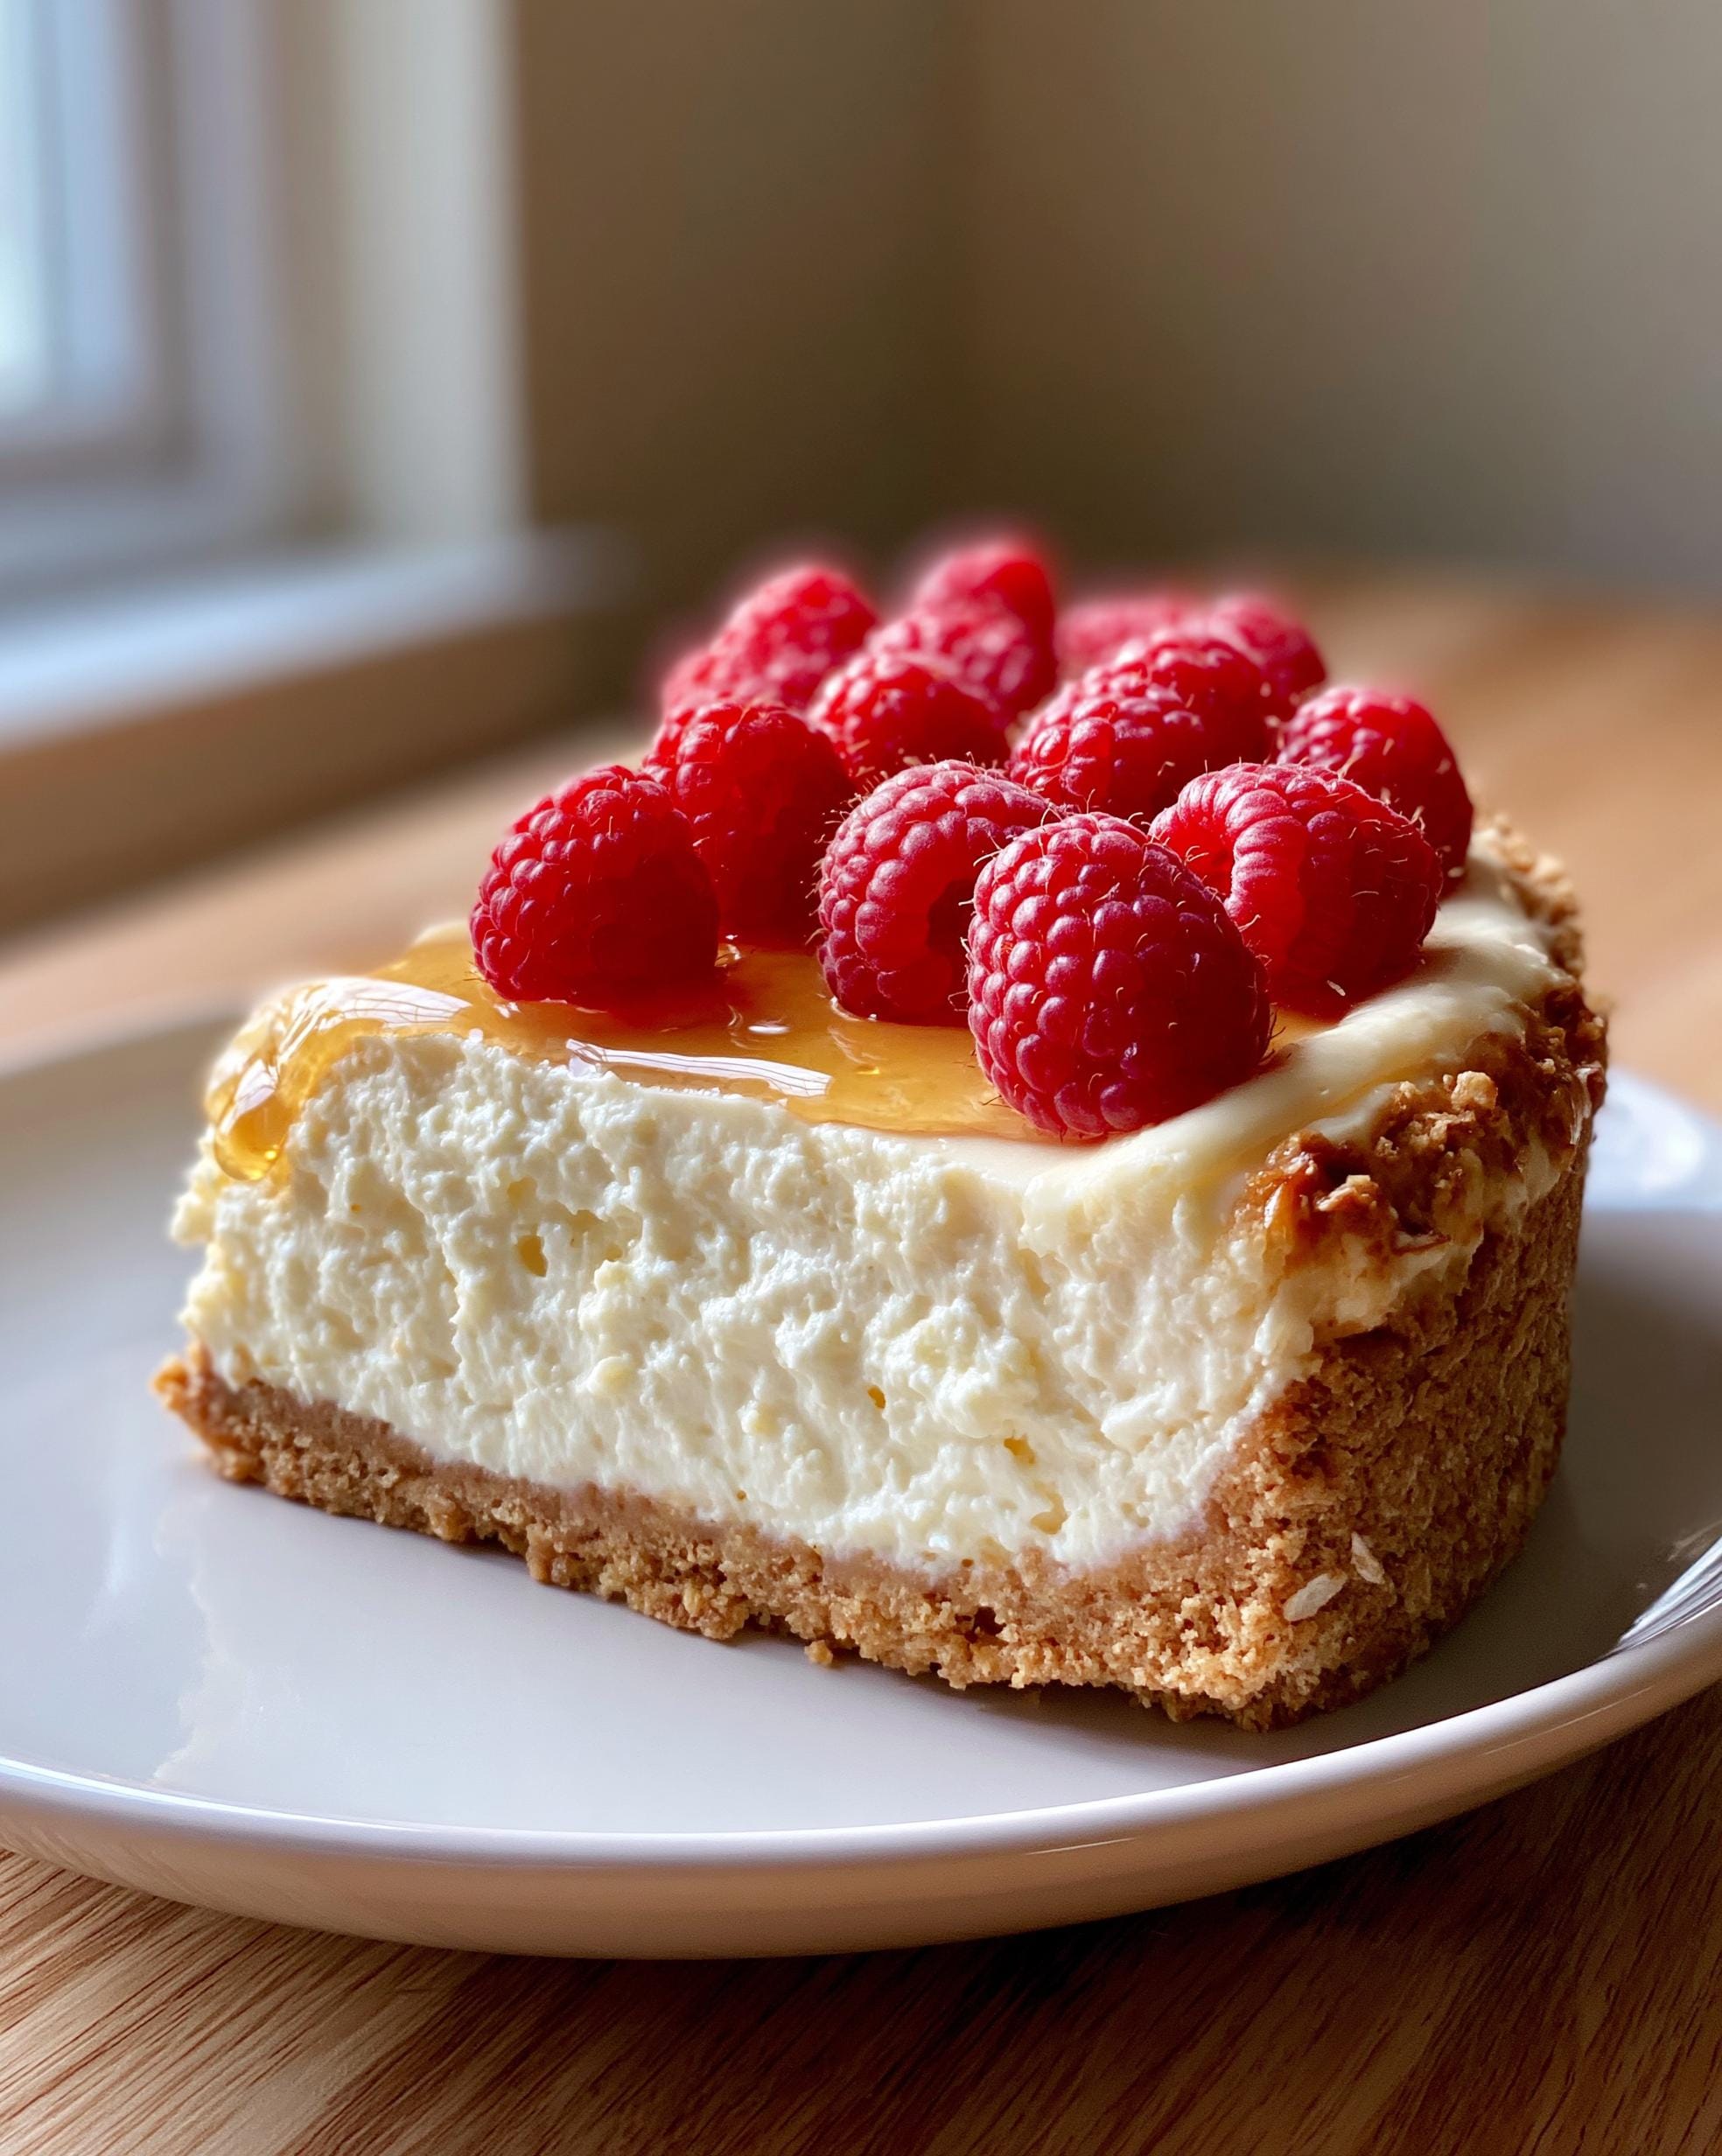
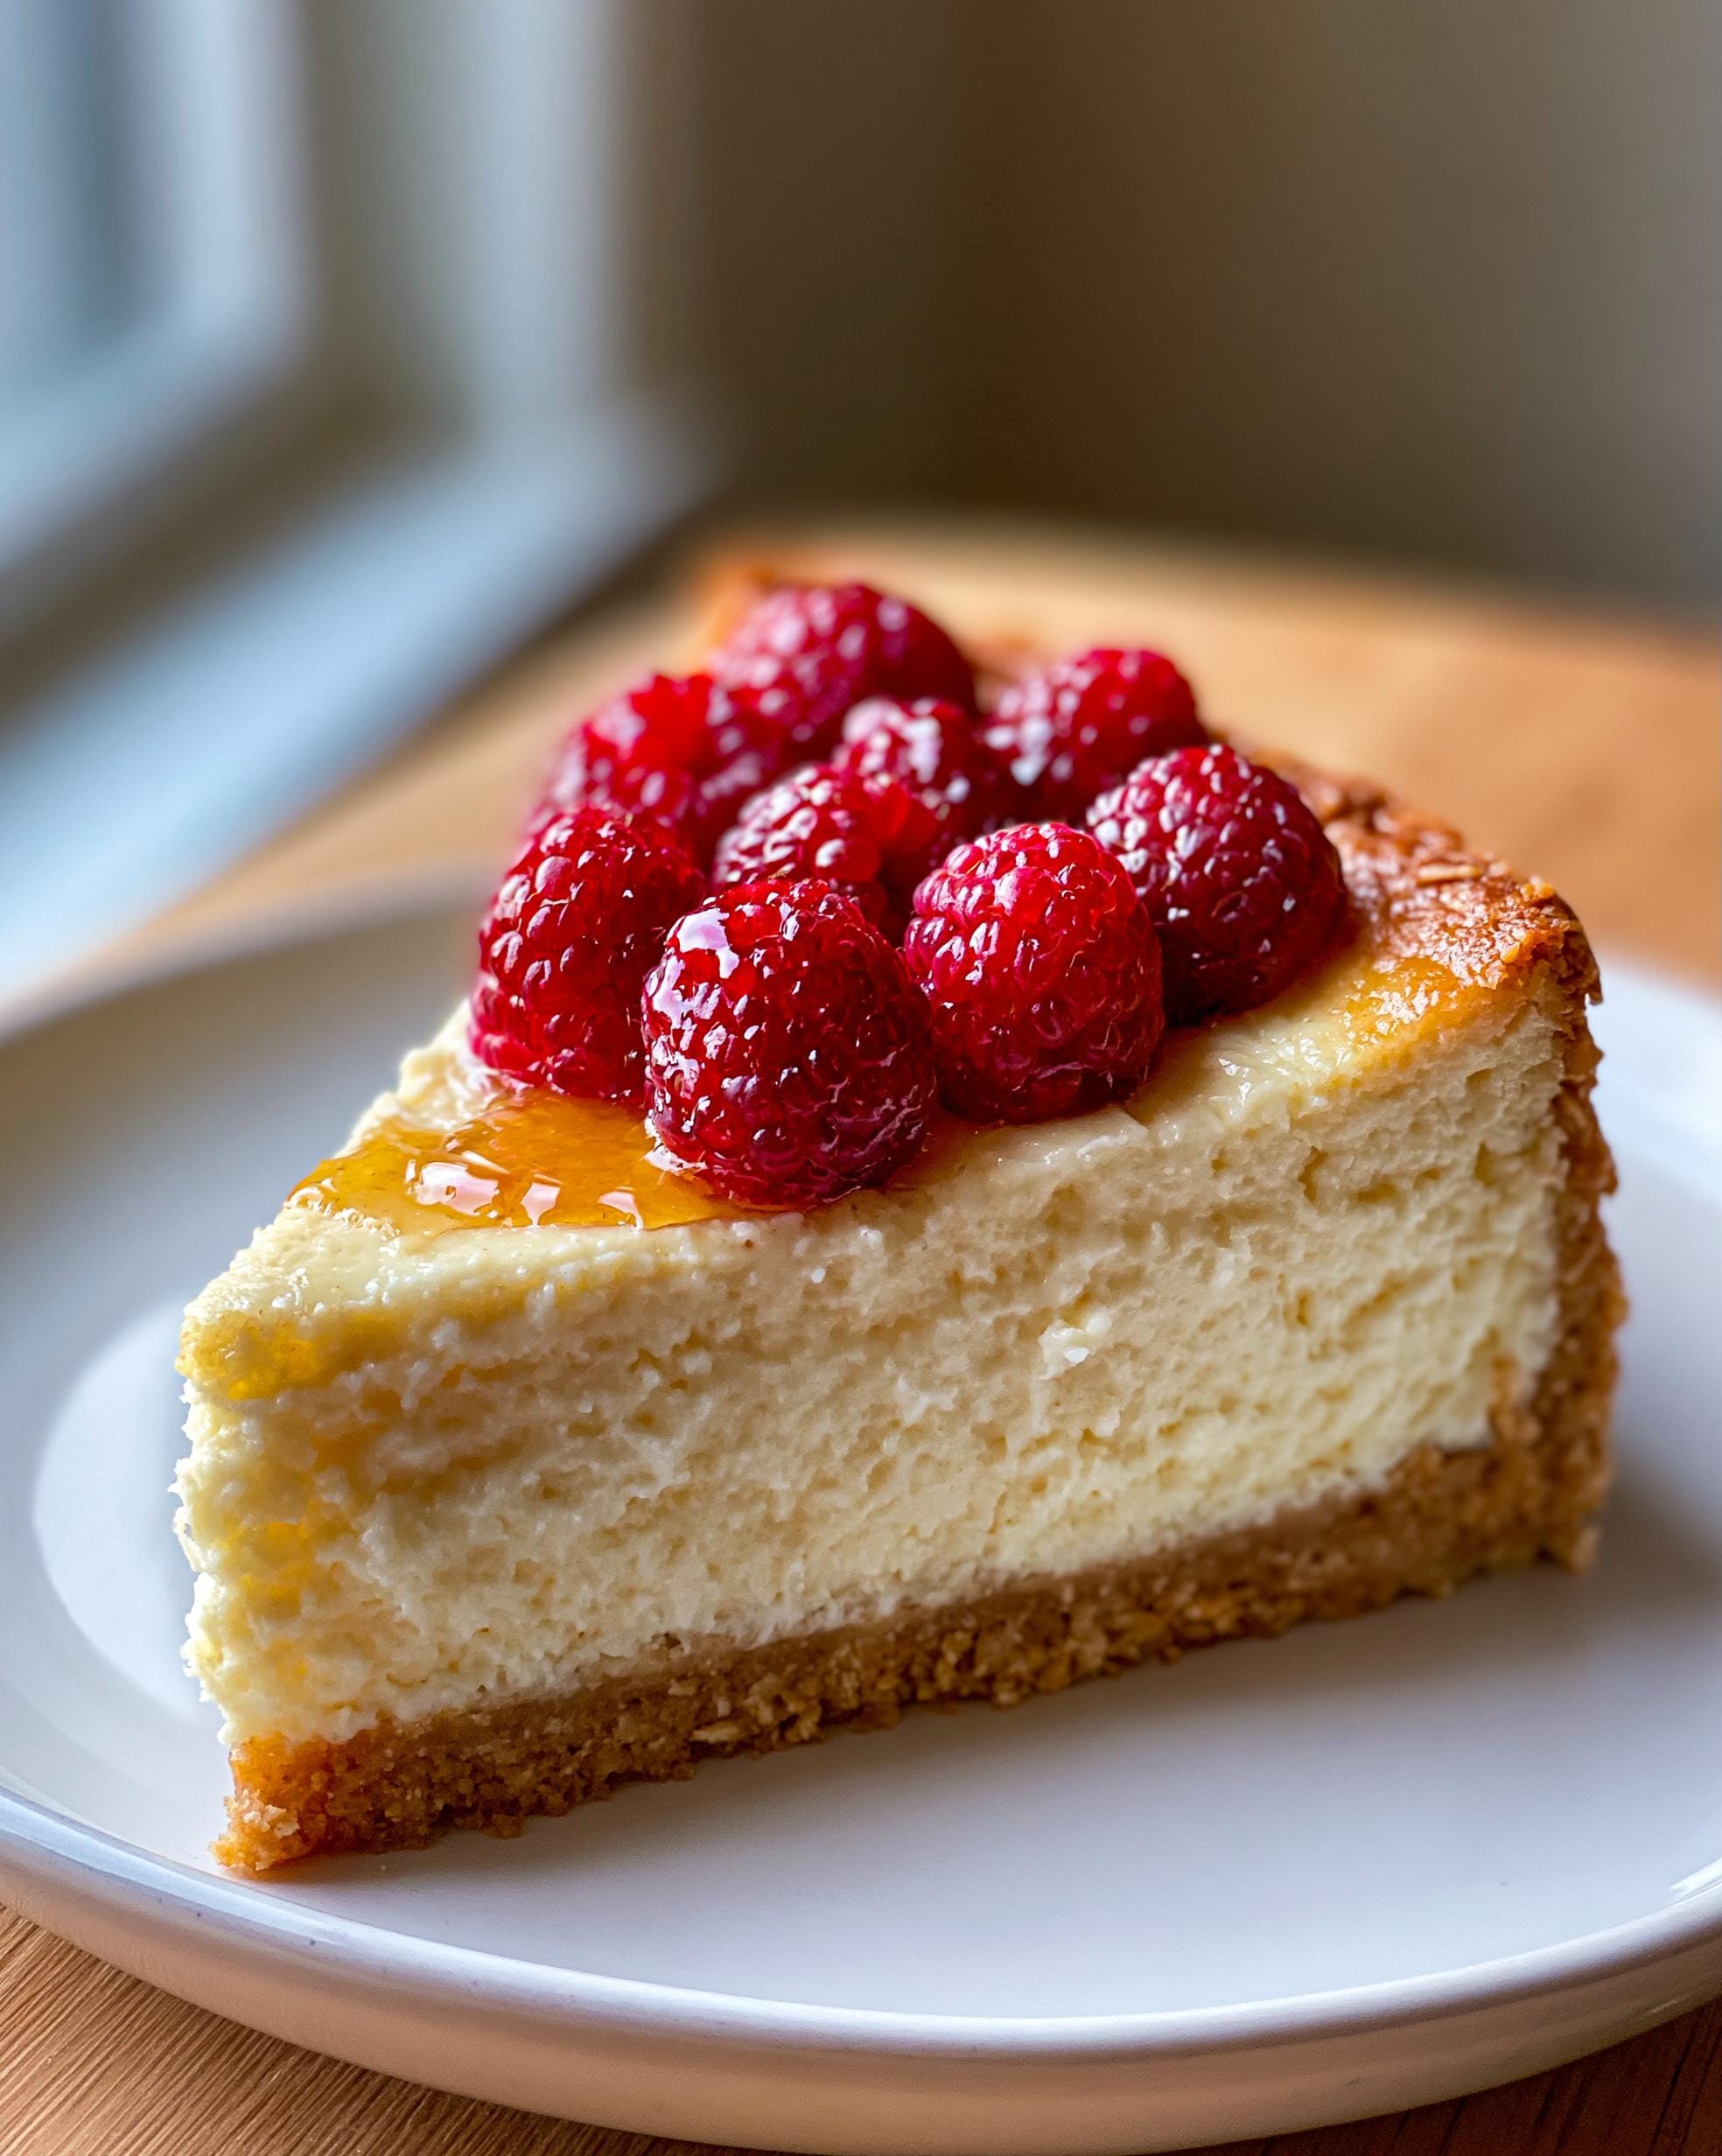
When you’re ready to serve, fresh berries are a classic topping. A little extra drizzle of honey or even a sprinkle of lemon zest takes it over the top. It’s your masterpiece, so decorate it how you like!
Storing and Serving Your Cottage Cheese Cheesecake
Alright, let’s talk about the best part—eating it! For storage, just cover the pan tightly with plastic wrap or foil, or pop the whole thing (if it fits) into one of those giant reusable containers. It’ll keep beautifully in the fridge for up to 4 days. Honestly, I think it’s even better on day two after it’s chilled overnight. The texture firms up perfectly and the flavors really settle in.
When you’re ready to serve, grab a sharp, thin knife. Run it under hot water and wipe it clean between each slice. This little trick gives you those gorgeous, clean cuts with no dragging or crumbly edges. I love topping mine with a big pile of fresh berries or a quick mango salsa. So good!
I don’t recommend freezing this one. Cottage cheese can get a bit grainy when thawed, and you’ll lose that wonderful creamy texture we worked so hard for.
Cottage Cheese Cheesecake FAQs
I get questions about this cheesecake all the time! Here are the answers to the ones I hear most often.
Can I use full-fat cottage cheese?
Absolutely! It will make the cheesecake richer and a bit more decadent. Just know the fat and calorie count will be a little higher, but the texture will be incredible.
Can I make this cottage cheese cheesecake without a springform pan?
You can try a deep 9-inch pie dish in a pinch. The tricky part is getting those clean slices out, so you’ll probably end up scooping it more than slicing it, which is totally fine!
Why is my filling grainy?
You probably just need to blend it longer. Seriously, blend until it’s completely, utterly smooth—it might take a full two minutes. The cottage cheese curds need to break down completely for that silky texture.
Nutritional Information for Cottage Cheese Cheesecake
I always like to be upfront about this: the nutrition facts for any homemade recipe are just estimates. The exact numbers can vary a ton depending on the specific brands of cottage cheese, Greek yogurt, and honey you use. So please consider any info you see as a helpful guideline, not a precise measurement.
Before You Go
I really hope you give this cottage cheese cheesecake a try. It’s become my go-to for when I need a dessert that feels special but still fits my goals. If you make it, I’d love to hear how it turns out for you! Share a pic or tell me about it on Facebook. Happy baking!

Cottage Cheese Cheesecake
Ingredients
Equipment
Method
- Preheat the oven to 325°F.
- Lightly grease an 8-inch springform pan and line the bottom with parchment paper.
- Blend the oats in a food processor until they resemble coarse crumbs.
- Stir together the oat crumbs, honey, and melted butter.
- Press the mixture firmly into the bottom of the prepared pan.
- Bake the crust for 8 minutes and allow it to cool slightly.
- Add the cottage cheese, Greek yogurt, eggs, honey, vanilla extract, cornstarch, lemon juice, and salt to a blender.
- Blend until completely smooth and creamy.
- Pour the filling over the crust and smooth the top.
- Bake for 45 to 50 minutes until the edges are set and the center has a slight wobble.
- Turn off the oven and leave the cheesecake inside with the door cracked open for 15 minutes.
- Remove from the oven and cool completely at room temperature.
- Refrigerate for at least 6 hours or overnight before slicing.