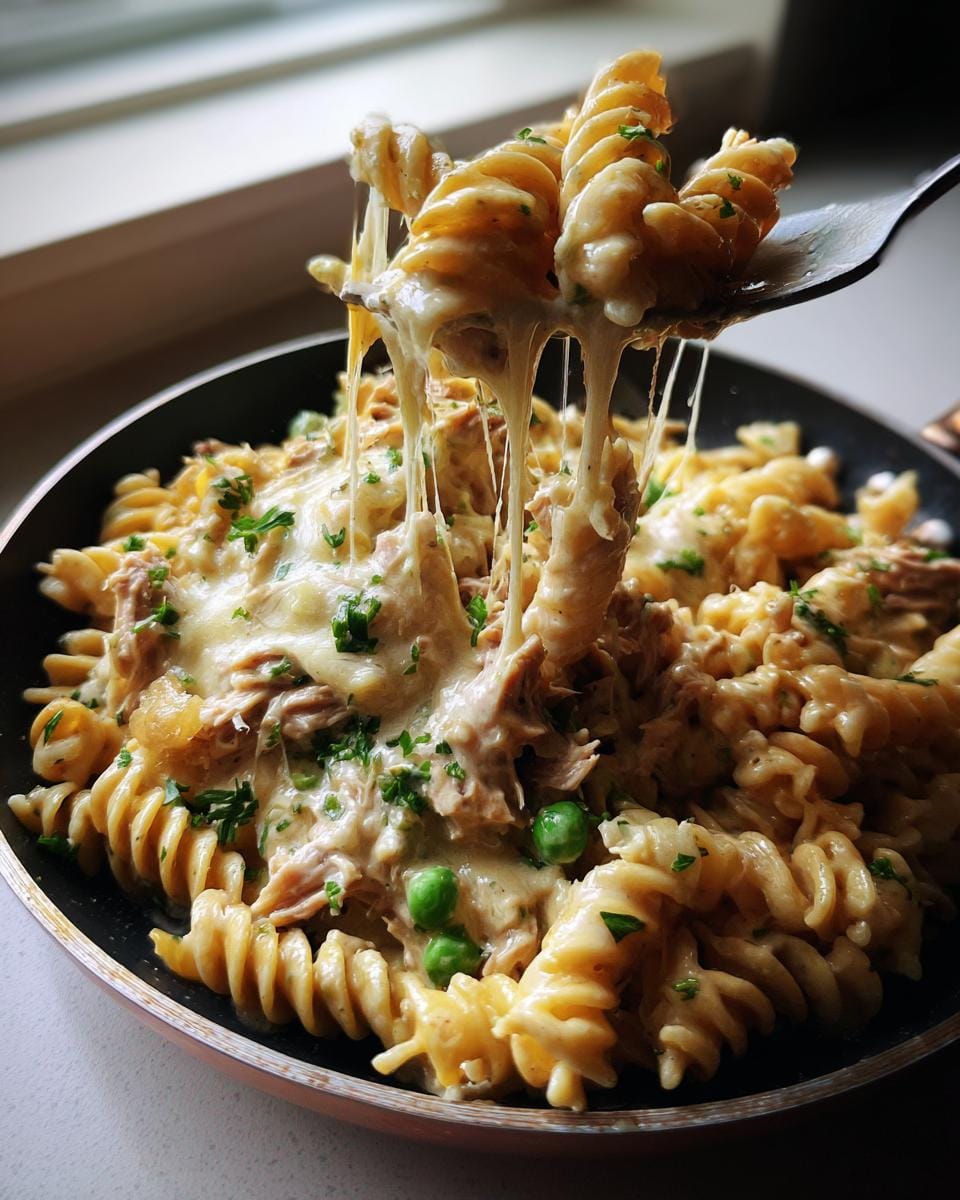
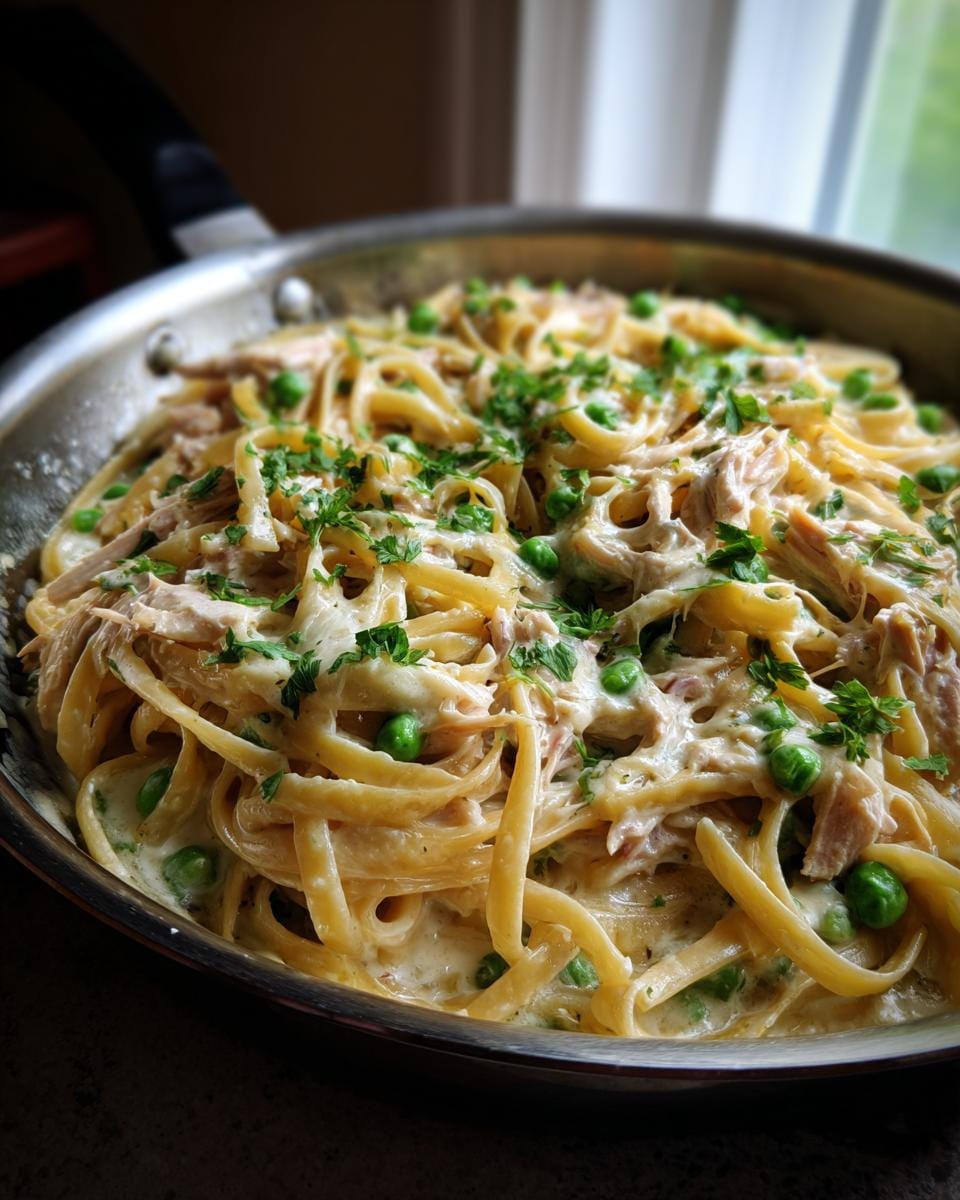
Oh, you know those nights. The ones where you walk in the door, the fridge looks sad, and the thought of making a fancy dinner feels like climbing Mount Everest? Yeah, I’ve been there SO many times. That’s exactly when this tuna noodle skillet became my absolute savior! Seriously, in about 30 minutes, I can whip up this comforting, one-pan wonder that tastes like pure cozy goodness but is actually packed with protein and veggies. It’s my secret weapon for those crazy weeknights when everyone’s hungry and I just need something *easy* and delicious. Trust me, it’ll save your sanity too.
Why You’ll Love This Tuna Noodle Skillet
This recipe is a lifesaver for busy evenings!
- It’s super quick – ready in about 30 minutes!
- Cleanup is a breeze with just one pan.
- It’s packed with protein and healthy ingredients.
- Totally comforting and satisfying, but still light!
Ingredients for Your Tuna Noodle Skillet
The beauty of this one-pan wonder is how simple the ingredients are! You probably have most of them in your pantry already.
- 8 ounces whole wheat pasta (I like using rotini or elbow macaroni for this!)
- 1 tablespoon olive oil
- 1 cup chopped onion (about half a medium onion)
- 2 cloves garlic, minced
- 2 cans (5 ounces each) tuna, drained really well
- 1 cup frozen peas (no need to thaw!)
- 1 cup low-fat milk
- 1/2 cup chicken broth
- 1 tablespoon all-purpose flour (this is our secret thickener!)
- 1/2 teaspoon salt
- 1/2 teaspoon black pepper
- 1/2 teaspoon dried thyme
- 1/2 cup shredded cheddar cheese
- 2 tablespoons fresh parsley, chopped (for that pop of freshness at the end!)
Simple Steps for the Perfect Tuna Noodle Skillet
Okay, here’s where the magic happens! This tuna noodle skillet comes together SO fast, it’s almost unbelievable. My biggest tip? Have everything prepped and ready to go before you start. It makes the whole process super smooth. You can totally speed things up by cooking your pasta while you’re doing the first few sauté steps!
Step 1: First things first, get your pasta cooking according to the package directions. You want it al dente, meaning it still has a tiny bit of bite to it, because it’ll finish cooking in the sauce. Once it’s done, drain it and set it aside. Easy peasy!
Step 2: Now, grab a large skillet – the bigger the better, trust me! Heat up that tablespoon of olive oil over medium heat. Toss in your chopped onion and let it get soft and a little see-through, which usually takes about 3 to 4 minutes. Give it a stir now and then.
Step 3: Throw in your minced garlic. Be careful, garlic burns fast! Just cook it for about 30 seconds until it smells amazing. Seriously, that smell is the best part of starting this dish.
Step 4: This is key for a creamy sauce: sprinkle the flour right over the onion and garlic mixture. Stir it all around for about a minute. This little bit of cooking helps get rid of any raw flour taste and starts thickening everything up nicely.
Step 5: Time for the liquids! Slowly pour in your milk and chicken broth while whisking like crazy. Keep whisking constantly until it’s all smooth and there are no floury lumps. It’s like making a mini béchamel sauce right in your skillet!
Step 6: Season it up! Add your salt, pepper, and that lovely dried thyme. Let the sauce simmer gently for about 3 to 5 minutes. You’ll see it starting to thicken up beautifully. Keep stirring it so it doesn’t stick to the bottom.
Step 7: Now for the stars of the show! Stir in your frozen peas and the well-drained tuna. Just gentle breaking up the tuna as you stir. Cook everything for another 2 to 3 minutes, just long enough to heat everything through.
Step 8: Add your cooked pasta back into the skillet with all that yummy sauce, tuna, and peas. Give it a good toss to make sure every single piece of pasta is coated in that creamy goodness. Oh, this is looking good!
Step 9: Sprinkle the shredded cheddar cheese all over the top. Let it sit for about 30 seconds to a minute, then give it a final stir until the cheese is all melted and gooey. Seriously, that cheesy, creamy texture is everything!
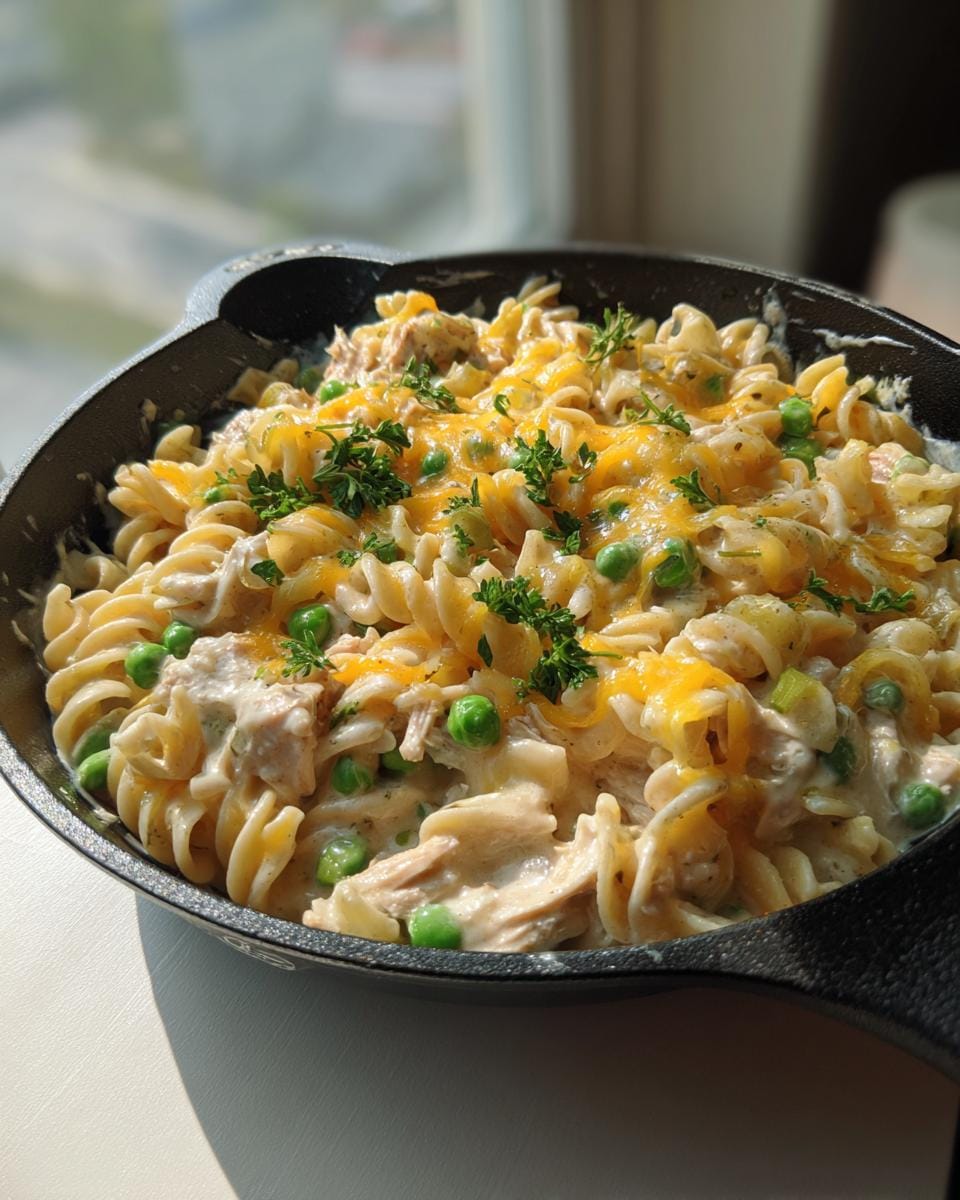
Step 10: Finish it off with a sprinkle of fresh chopped parsley. It adds a gorgeous pop of color and a little freshness that cuts through the richness. Serve it up right away and enjoy your amazing tuna noodle skillet!
Serving Suggestions for Your Tuna Noodle Skillet
This tuna noodle skillet is pretty much a complete meal on its own, but sometimes you just want a little something extra, right? These are my favorite easy additions!
Simple Green Salad: A light, crisp side salad with a simple vinaigrette really brightens up the creamy richness of the skillet. It adds that fresh crunch factor I love!
Steamed Broccoli: Oh, broccoli! It’s so easy to just steam up a batch and it takes on the flavors of whatever you’re serving so well. Plus, it sneaks in extra veggies.
Crusty Bread: Honestly, sometimes you just need some good bread to sop up all that delicious sauce. French baguette, sourdough, whatever you have on hand works!
Storing and Reheating Your Tuna Noodle Skillet
Leftovers? Yes, please! This tuna noodle skillet is actually pretty fantastic the next day. My sister always packs the leftovers for her lunch. Here are my best tips for keeping it delicious.
You can totally store any leftover tuna noodle skillet in an airtight container in the fridge for about 3 to 4 days. Honestly, I find it tastes even better the next day because all those flavors have had a chance to meld together even more!
When you’re ready to reheat, I highly recommend doing it on the stovetop. Just scoop the leftovers into a skillet over medium-low heat, giving it a stir now and then. If it seems a little thick, you can add a tiny splash of milk or broth to loosen it up. Microwaving works too, but you might lose a little of that creamy texture. Just pop it in a microwave-safe dish and heat in 1-minute intervals, stirring in between, until it’s warmed through.
Frequently Asked Questions about Tuna Noodle Skillet
Got questions about this speedy skillet? I’ve got answers! Here are a few things people often ask.
Can I use regular pasta instead of whole wheat?
Absolutely! While I love the whole wheat for an extra fiber boost, feel free to use any pasta shape you have on hand – like elbow macaroni, penne, or even shells. Just be sure to cook it until al dente so it doesn’t get mushy in the skillet.
How can I make this tuna noodle skillet dairy-free or vegan?
Great question! For a dairy-free version, swap the milk for unsweetened almond or soy milk and use a dairy-free cheddar alternative. For a vegan option, you’d need to replace the tuna with something like chickpeas or white beans, and use a plant-based milk and cheese. It’ll be a different dish, but still delicious! For more tips like this, check out our X (Twitter)!
Can I add other vegetables to this recipe?
Definitely! This is where you can get creative. Sautéed mushrooms, steamed broccoli florets, or a handful of spinach wilted in at the end are all fantastic additions. Just add them in when you’re adding the peas and tuna so they have a chance to heat through. You can follow us on Facebook for more veggie ideas!
Before You Go
I really hope you give this speedy tuna noodle skillet a try soon! It’s such a lifesaver on busy nights. Let me know in the comments below how yours turned out – I love hearing from you!

Healthy Tuna Noodle Skillet
Ingredients
Equipment
Method
- Cook pasta according to package directions until al dente. Drain and set aside.
- Heat olive oil in a large skillet over medium heat. Add onion and cook for 3 to 4 minutes until softened.
- Stir in garlic and cook for 30 seconds until fragrant.
- Sprinkle flour over the onion mixture and stir well to coat. Cook for 1 minute.
- Slowly whisk in milk and chicken broth, stirring constantly to create a smooth sauce.
- Add salt, black pepper, and dried thyme. Simmer for 3 to 5 minutes until slightly thickened.
- Stir in frozen peas and drained tuna. Cook for 2 to 3 minutes until heated through.
- Add cooked pasta to the skillet and toss to combine evenly with the sauce.
- Sprinkle cheddar cheese over the top and stir until melted and creamy.
- Garnish with fresh parsley before serving.