Okay, I need to confess something. I used to stress myself out trying to make a dozen different snacks for game day. I’d be stuck in the kitchen while everyone else was having fun. Then I figured out the secret: you just need one amazing, can’t-stop-eating-it centerpiece dish. That’s exactly what these Buffalo Chicken Sliders are for me. They combine that bold, tangy buffalo flavor we all crave with the simplest prep you can imagine—just mix, layer, and bake. Now, whenever the game’s on or my kids have friends over, this is my absolute go-to. The whole pan disappears every single time, and I get to actually enjoy the party too.
Why You’ll Love This Buffalo Chicken Sliders Recipe
I’ve made these so many times for everything from lazy weeknights to my son’s birthday party. Every single time, I’m reminded why this is the recipe I keep coming back to. It just makes life easier and tastier.
- Super Fast & Easy: Seriously, if you can stir stuff in a bowl and use an oven, you’ve got this. It’s about 15 minutes of hands-on work, then the oven does the rest while you clean up or, you know, actually relax.
- Minimal Cleanup: You mix everything in one bowl and bake it all in one dish. That means less time scrubbing pots and more time eating. It’s a huge win in my book.
- Perfect for Any Gathering: Game day? Check. Potluck? Check. Busy family dinner? Double check. They’re a total crowd-pleaser that feels special but requires zero chef skills. I’ve even brought them to book club!
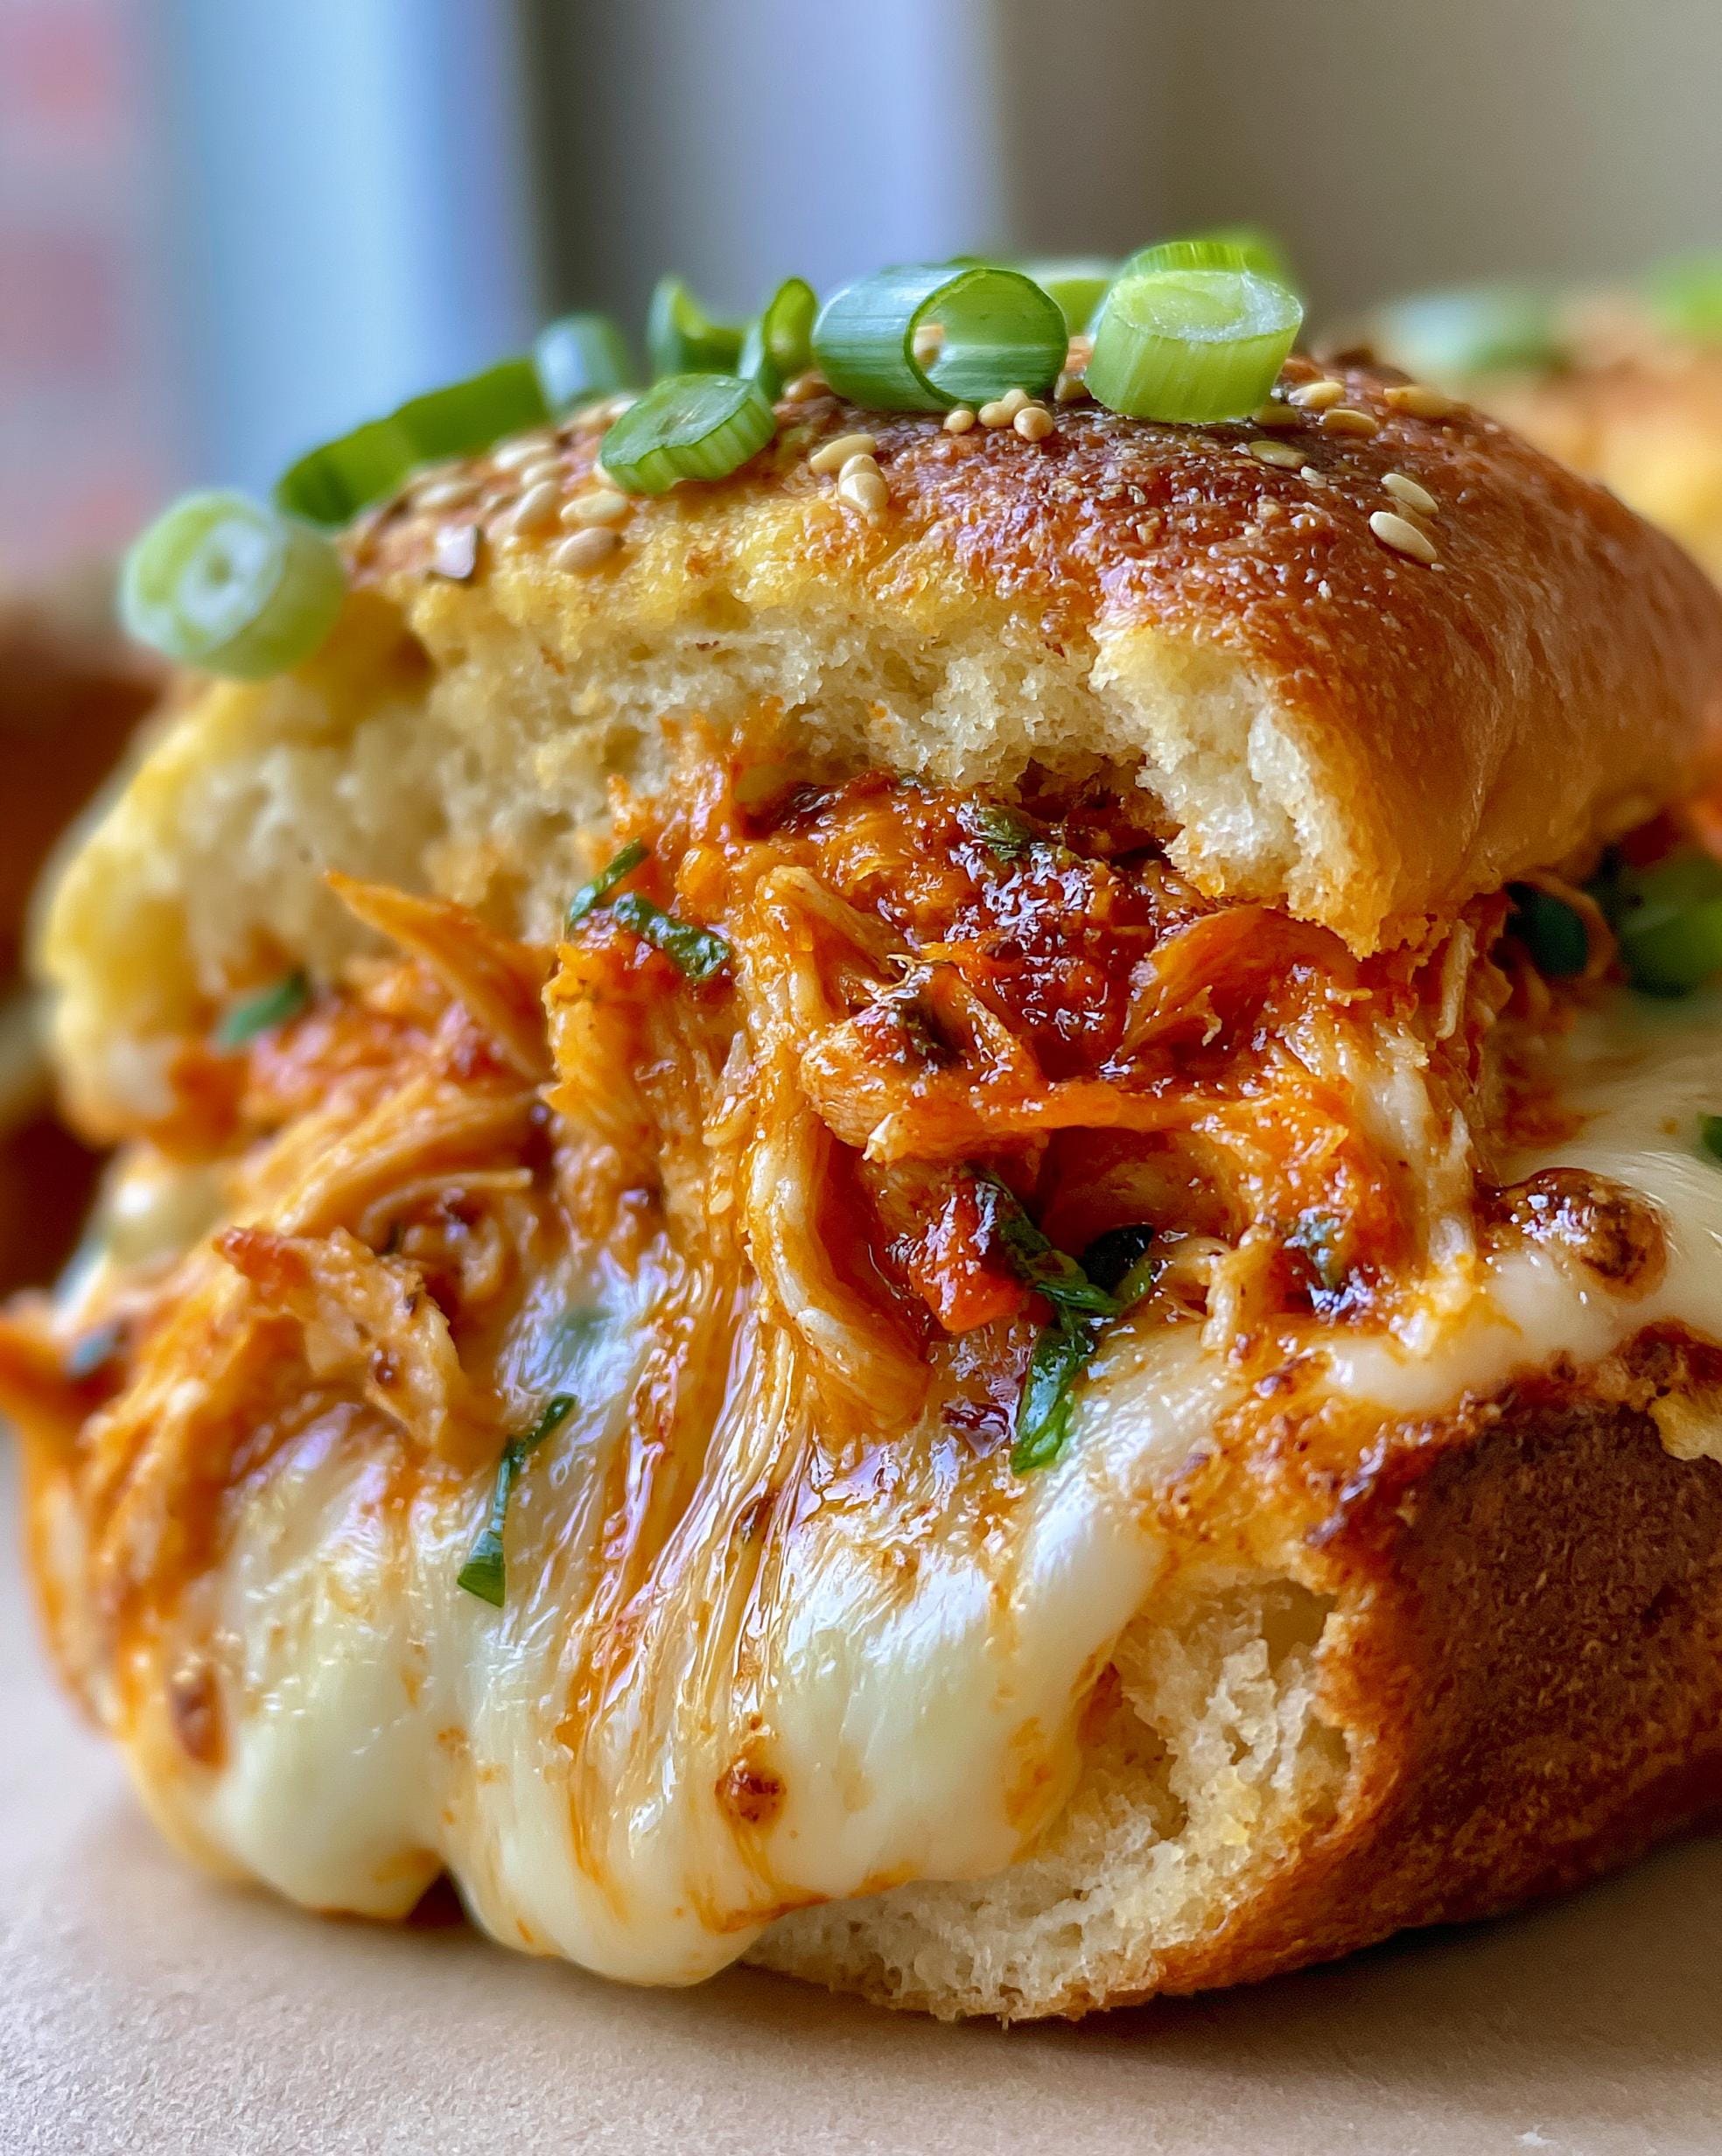
- Packed with Flavor & Protein: The baked chicken stays super tender and soaks up all that spicy buffalo sauce, and with all that cheese, each slider is satisfying and keeps you full. It’s way better than ordering greasy wings.
- Customizable Heat Level: Love it fiery? Use a hotter sauce. Feeding little ones or sensitive palates? Go with a mild wing sauce. You’re in complete control, just like with my favorite slow cooker mac and cheese where you can adjust the cheeses.
Ingredients for Buffalo Chicken Sliders
Honestly, the magic here is in the quality of a few key things. Using a good, tangy buffalo sauce makes all the difference, and those sweet Hawaiian rolls are non-negotiable for me—they balance the heat perfectly. I often use leftover garlic parmesan chicken or even air fryer buffalo chicken tenders for the shredded chicken. It’s a fantastic way to repurpose dinner!
- 12 Hawaiian slider rolls (1 standard package)
- 3 cups cooked shredded chicken breast (that’s about 1.5 pounds of chicken before cooking)
- 1 cup buffalo sauce (I always use Frank’s RedHot Original for that classic flavor)
- 1 tablespoon unsalted butter, melted
- 1 teaspoon garlic powder
- 1 teaspoon onion powder
- 8 slices provolone cheese
- 1 cup shredded mozzarella cheese
- 2 tablespoons sliced green onions (for garnish)
- 1 tablespoon sesame seeds (for the top)
How to Make Buffalo Chicken Sliders
Okay, here’s my pro-tip for perfect sliders: don’t skip that 5-minute rest at the end! It lets all the melty cheese settle so when you slice, you get clean, beautiful sliders and not a cheesy landslide. Trust me, I learned that the messy way.
Step 1: First things first, crank your oven to 350°F. This gives it plenty of time to get nice and hot while you assemble everything. Grab a 9×13 inch baking dish—that’s your one-pan wonder for the whole process.
Step 2: Take your whole sheet of Hawaiian rolls and slice them in half horizontally. You want to keep them all connected! It’s way easier to handle. Just use a long, sharp serrated knife and saw gently back and forth. Place the bottom half of the rolls right into your baking dish. It’s like making a little savory bread boat.
Step 3: In a big bowl, toss your shredded chicken with the buffalo sauce, garlic powder, and onion powder. Mix it until every single strand is coated and looking gloriously orange. This is also where you can taste and adjust—if you like it saucier, add a splash more. If your chicken is a bit dry, this is a great trick I use for my creamy chicken salad too.
Step 4: Layer time! Lay your provolone cheese slices over the bottom rolls. They’ll melt into an amazing, gooey base. Then, spoon your buffalo chicken mixture evenly over the cheese. Try to get it all the way to the edges so every bite has filling.
Step 5: Sprinkle the shredded mozzarella over the chicken, then top with the sliced green onions. The mozzarella adds that perfect stretchy melt, and the green onions give a fresh bite. Now, carefully place the top half of the rolls back on, like putting a lid on the tastiest present ever.
Step 6: Brush the tops of the rolls with the melted butter—this gives them that gorgeous golden color and soft crust. Then, sprinkle the sesame seeds all over. It looks so professional and adds a tiny bit of crunch.
Step 7: Cover the whole dish loosely with aluminum foil. This is key! It traps steam so the rolls get warm and soft without the tops browning too fast. Pop it in the oven and bake for 15 minutes.
Step 8: After 15 minutes, take the dish out (careful, it’s hot!) and remove the foil. Put it back in the oven, uncovered, for another 8 to 10 minutes. You’re looking for lightly golden tops and you should see the cheese bubbling around the edges. Your kitchen will smell incredible.
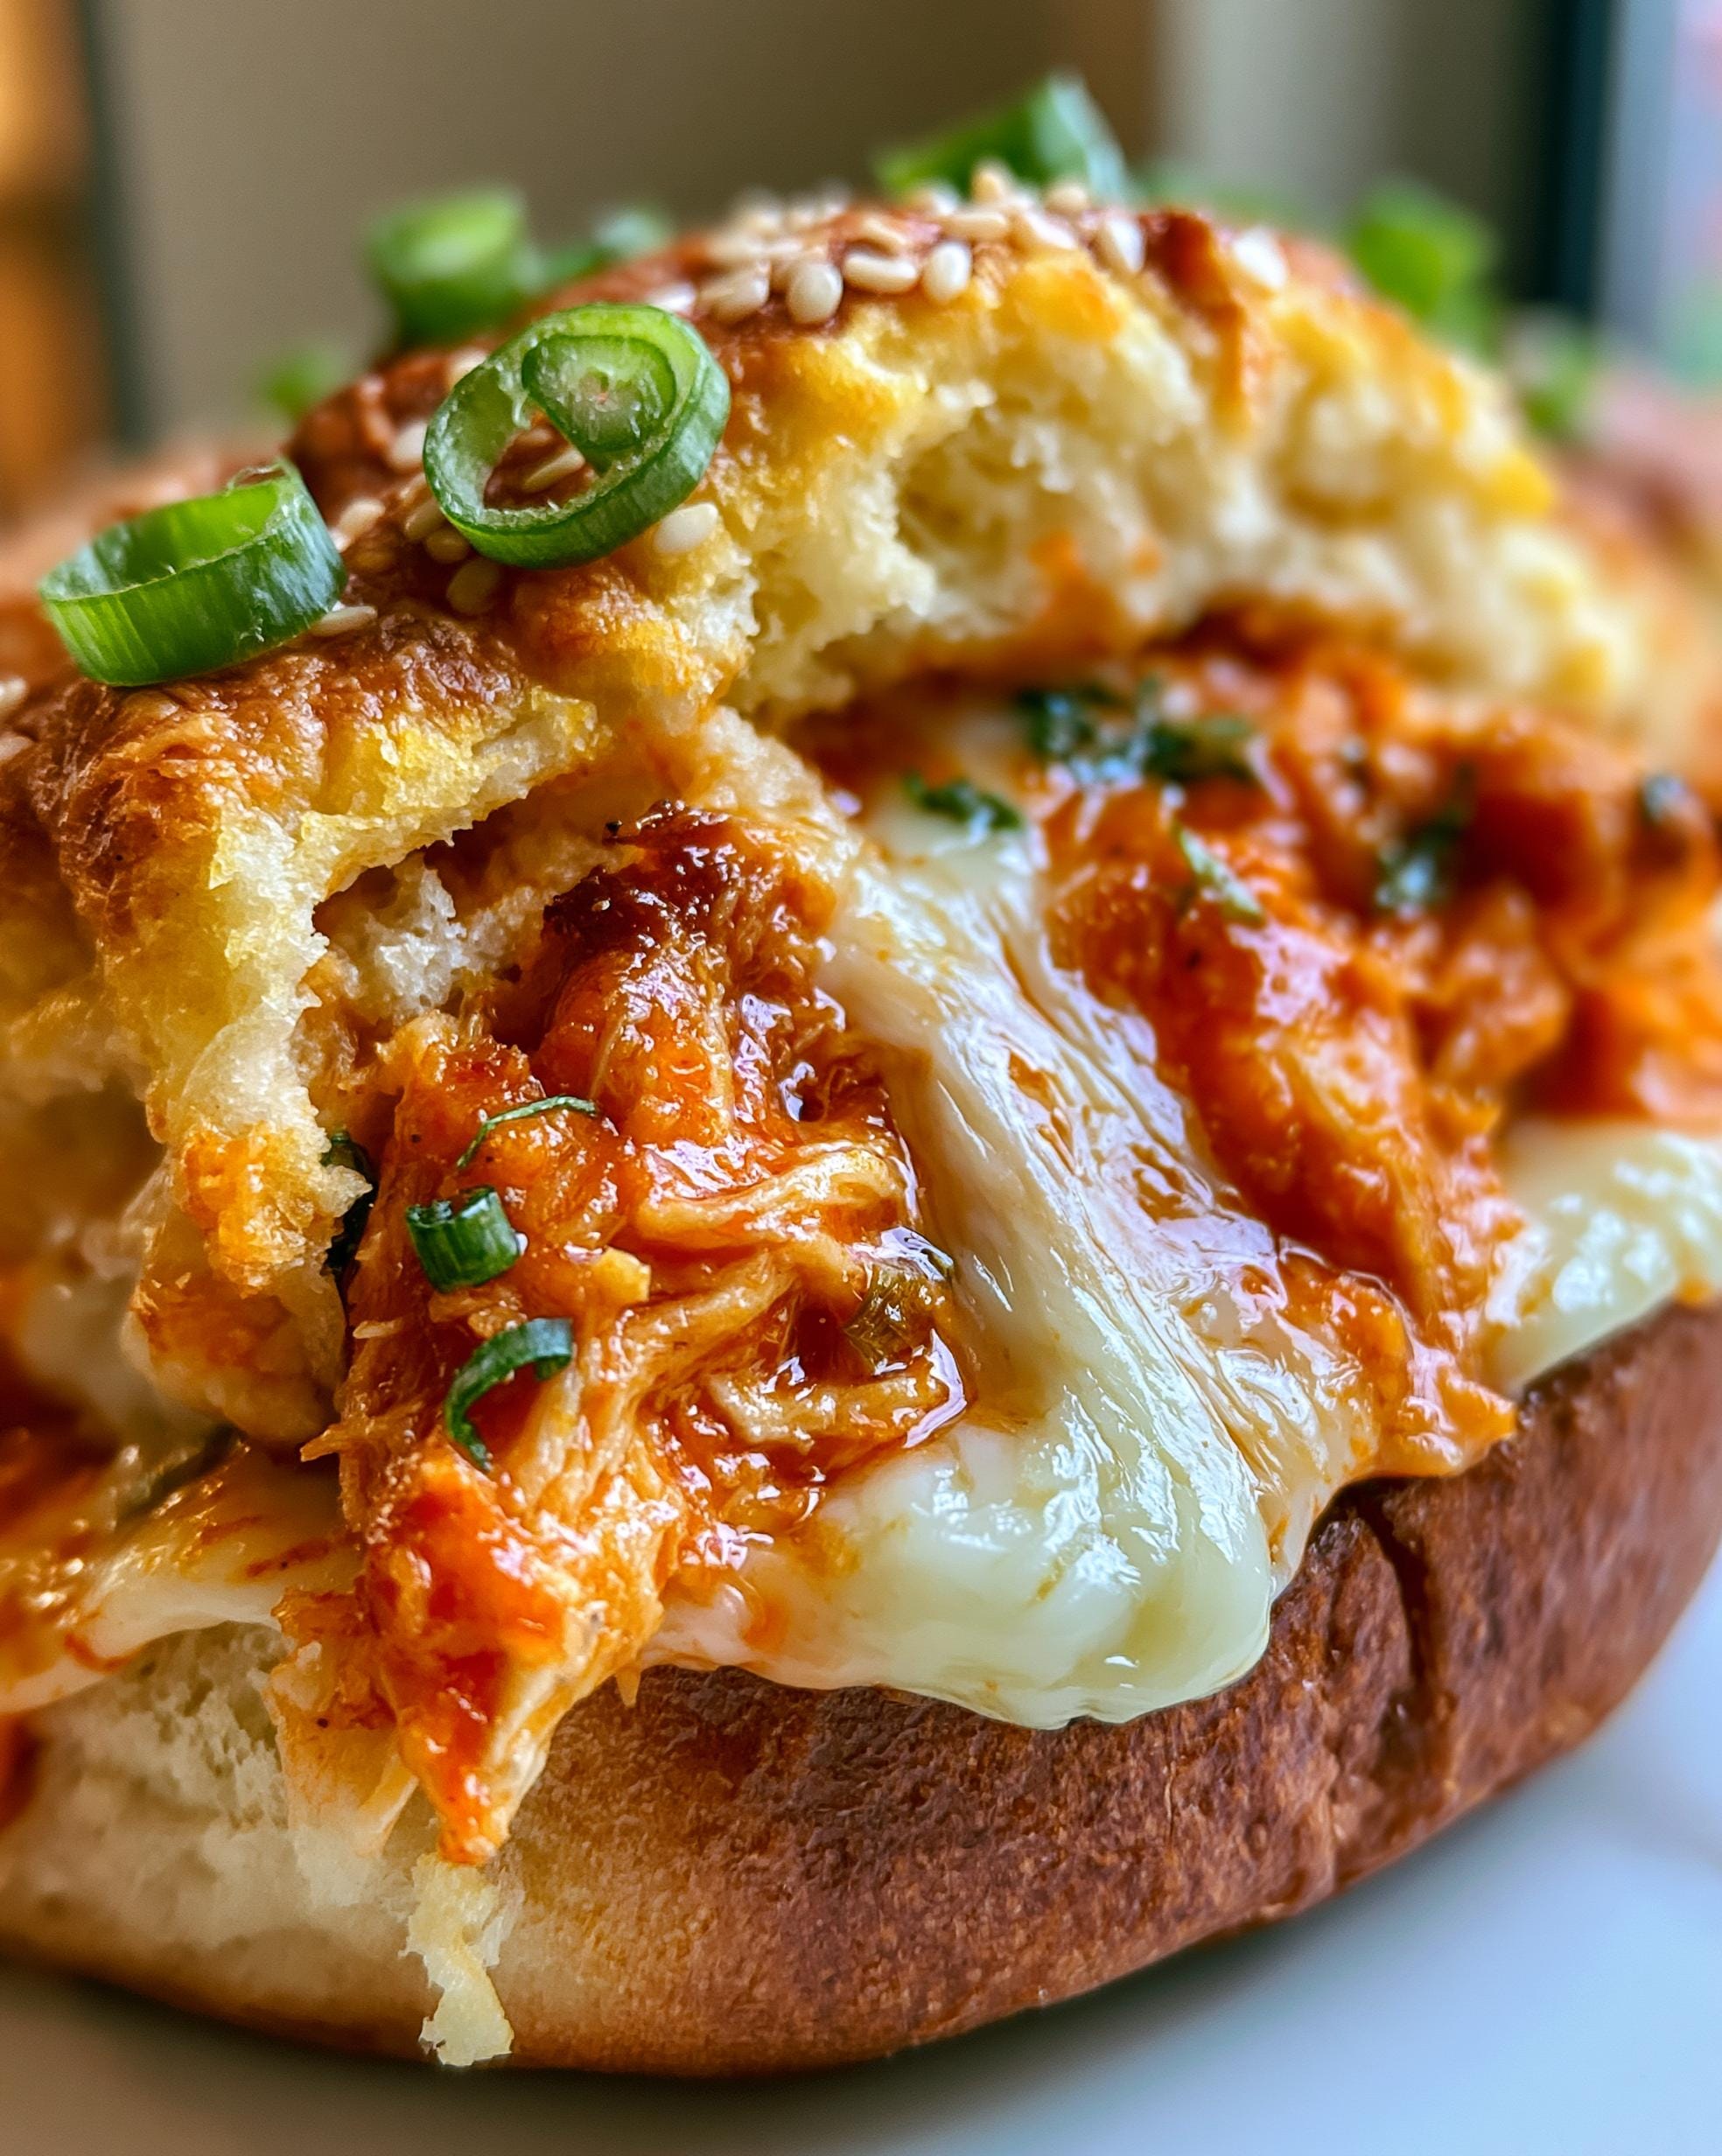
Step 9: This is the hardest but most important step: let it rest! Take the dish out and let it sit for a full 5 minutes. This lets the cheese set just enough so you can slice between the rolls without everything oozing out. Then, use a sharp knife to cut along the roll seams, serve, and watch them disappear.
Buffalo Chicken Sliders Storage and Meal Prep Tips
I’m a huge meal prep person, so I’ve tested all the ways to keep these sliders tasting fresh. The trick is storing the components separately until the last minute!
For leftover baked sliders, let them cool completely, then store them in an airtight container in the fridge for up to 3 days. To reheat, I much prefer the oven or air fryer (at 350°F for 5-7 minutes) to bring back that crispy top and melted cheese. The microwave works in a pinch, but it makes the rolls a bit soggy.
You can also assemble the sliders ahead of time (up to a day in advance), cover tightly with plastic wrap, and keep them in the fridge unbaked. Just let the dish sit on the counter for 20 minutes before baking, and add a few extra minutes to the covered baking time since it’s starting cold.
My favorite hack? Make a big batch of the shredded buffalo chicken filling and keep it in the fridge for up to 4 days. Then, you can throw a pan of sliders together in literally 5 minutes any night of the week. It’s a lifesaver.
Buffalo Chicken Sliders FAQ
I get asked these questions all the time, so you’re definitely not alone. Here are the quick answers that’ll save you a little kitchen stress.
Can I use rotisserie chicken for these sliders?
Absolutely, and I do it all the time! A store-bought rotisserie chicken is my secret weapon for making this recipe even faster. Just shred the breast meat (and some dark meat if you like) until you have about 3 cups. It’s already perfectly seasoned and juicy, so it works beautifully with the buffalo sauce. It’s the ultimate shortcut for a busy night.
How can I make this recipe spicier or milder?
You have total control here. For milder sliders, use a “mild” wing sauce or even mix your buffalo sauce with a little barbecue sauce or ranch dressing. For extra heat, use a spicier hot sauce like Frank’s Xtra Hot, or add a pinch of cayenne pepper or a few dashes of hot sauce to the chicken mixture. You can even sprinkle some sliced jalapeños over the cheese before baking!
Can I assemble Buffalo Chicken Sliders ahead of time?
Yes, and it’s a great party trick! You can assemble the whole pan, cover it tightly with plastic wrap, and refrigerate it for up to 24 hours before baking. Just take the dish out of the fridge about 20-30 minutes before you want to bake it, so it’s not ice-cold going into the oven. You might need to add 3-5 extra minutes to the covered baking time since you’re starting from a cooler temperature.
A Note on Nutritional Information
I always like to include this little reminder, because I know how helpful (and sometimes stressful!) tracking can be. I want you to have the best information possible.
Just a quick heads-up! The nutrition numbers you see here are estimates. They can change quite a bit depending on the exact brands of sauce, cheese, and rolls you use, or if you tweak the amounts to your taste. It’s always a good idea to calculate your own based on the specific products in your kitchen if you’re following a strict plan.
Before You Go
I really hope you give these a try in your own kitchen. They’ve brought so much easy, cheesy joy to our table, and I’d love to hear if they do the same for you!
If you make these Buffalo Chicken Sliders, please let me know how it goes! Leave a star rating or share your results in the comments. You can also tag me over on Facebook. Happy cooking!

Buffalo Chicken Sliders
Ingredients
Method
- Preheat the oven to 350°F.
- Slice the slider rolls in half horizontally while keeping the rolls connected. Place the bottom half in a 9 x 13-inch baking dish.
- In a large bowl, combine the shredded chicken, buffalo sauce, garlic powder, and onion powder. Stir until evenly coated.
- Layer the provolone cheese over the bottom rolls.
- Spread the buffalo chicken mixture evenly over the cheese.
- Sprinkle the mozzarella cheese over the chicken and top with sliced green onions.
- Place the top half of the rolls over the filling.
- Brush the tops with melted butter and sprinkle with sesame seeds.
- Cover loosely with foil and bake for 15 minutes.
- Remove the foil and bake for 8 to 10 minutes more until the tops are lightly golden and the cheese is melted.
- Let the sliders rest for 5 minutes before slicing and serving.
- If using freshly cooked chicken, ensure it reaches an internal temperature of 165°F before shredding and serving.