Okay, I have to tell you about my Protein Cheesecake. It’s my ultimate solution for when that cheesecake craving hits, but I don’t want to feel like I’ve completely undone my workout. I was deep into my fitness journey a few months back and desperately missed having a rich, creamy dessert. After what felt like a million experiments (some great, some… not so much), I landed on this version that uses cottage cheese and Greek yogurt. The result? A seriously indulgent slice that’s packed with protein and perfect for hitting your fitness goals or just having a healthier treat ready in the fridge.
Why You’ll Love This Protein Cheesecake
I know it sounds almost too good to be true, but trust me, this recipe delivers on every promise. It’s the one I make when I want dessert to feel like a treat, not a compromise.
Seriously, here’s why you’re going to adore it:
- Packed with Protein: Each slice gives you a solid 15 grams of protein. That comes from the powerhouse duo of cottage cheese and Greek yogurt, which are staples in my kitchen for everything from brownies to savory egg bites. It makes this cheesecake a perfect post-workout refuel or a satiating snack.
- Unbelievably Creamy: Don’t let the healthy ingredients fool you. Blending them until ultra-smooth creates a texture that’s rich, thick, and totally indulgent—just like the real thing.
- So Simple to Make: No water baths, no fancy techniques. You basically blend the filling, pour it over a quick oat crust, and bake. It’s way less fussy than traditional cheesecake, which is a huge win in my book.
- Guilt-Free Indulgence: It’s naturally lower in calories and sugar than the classic version, so you can enjoy a whole slice without any of the “why did I do that?” feeling afterward.
- Crazy Versatile: Have it as a healthy dessert, slice it for your weekly meal prep, or grab a piece after the gym. It fits perfectly into so many different days.
It honestly checks all the boxes for a delicious, smart treat.
Ingredients for Your Protein Cheesecake
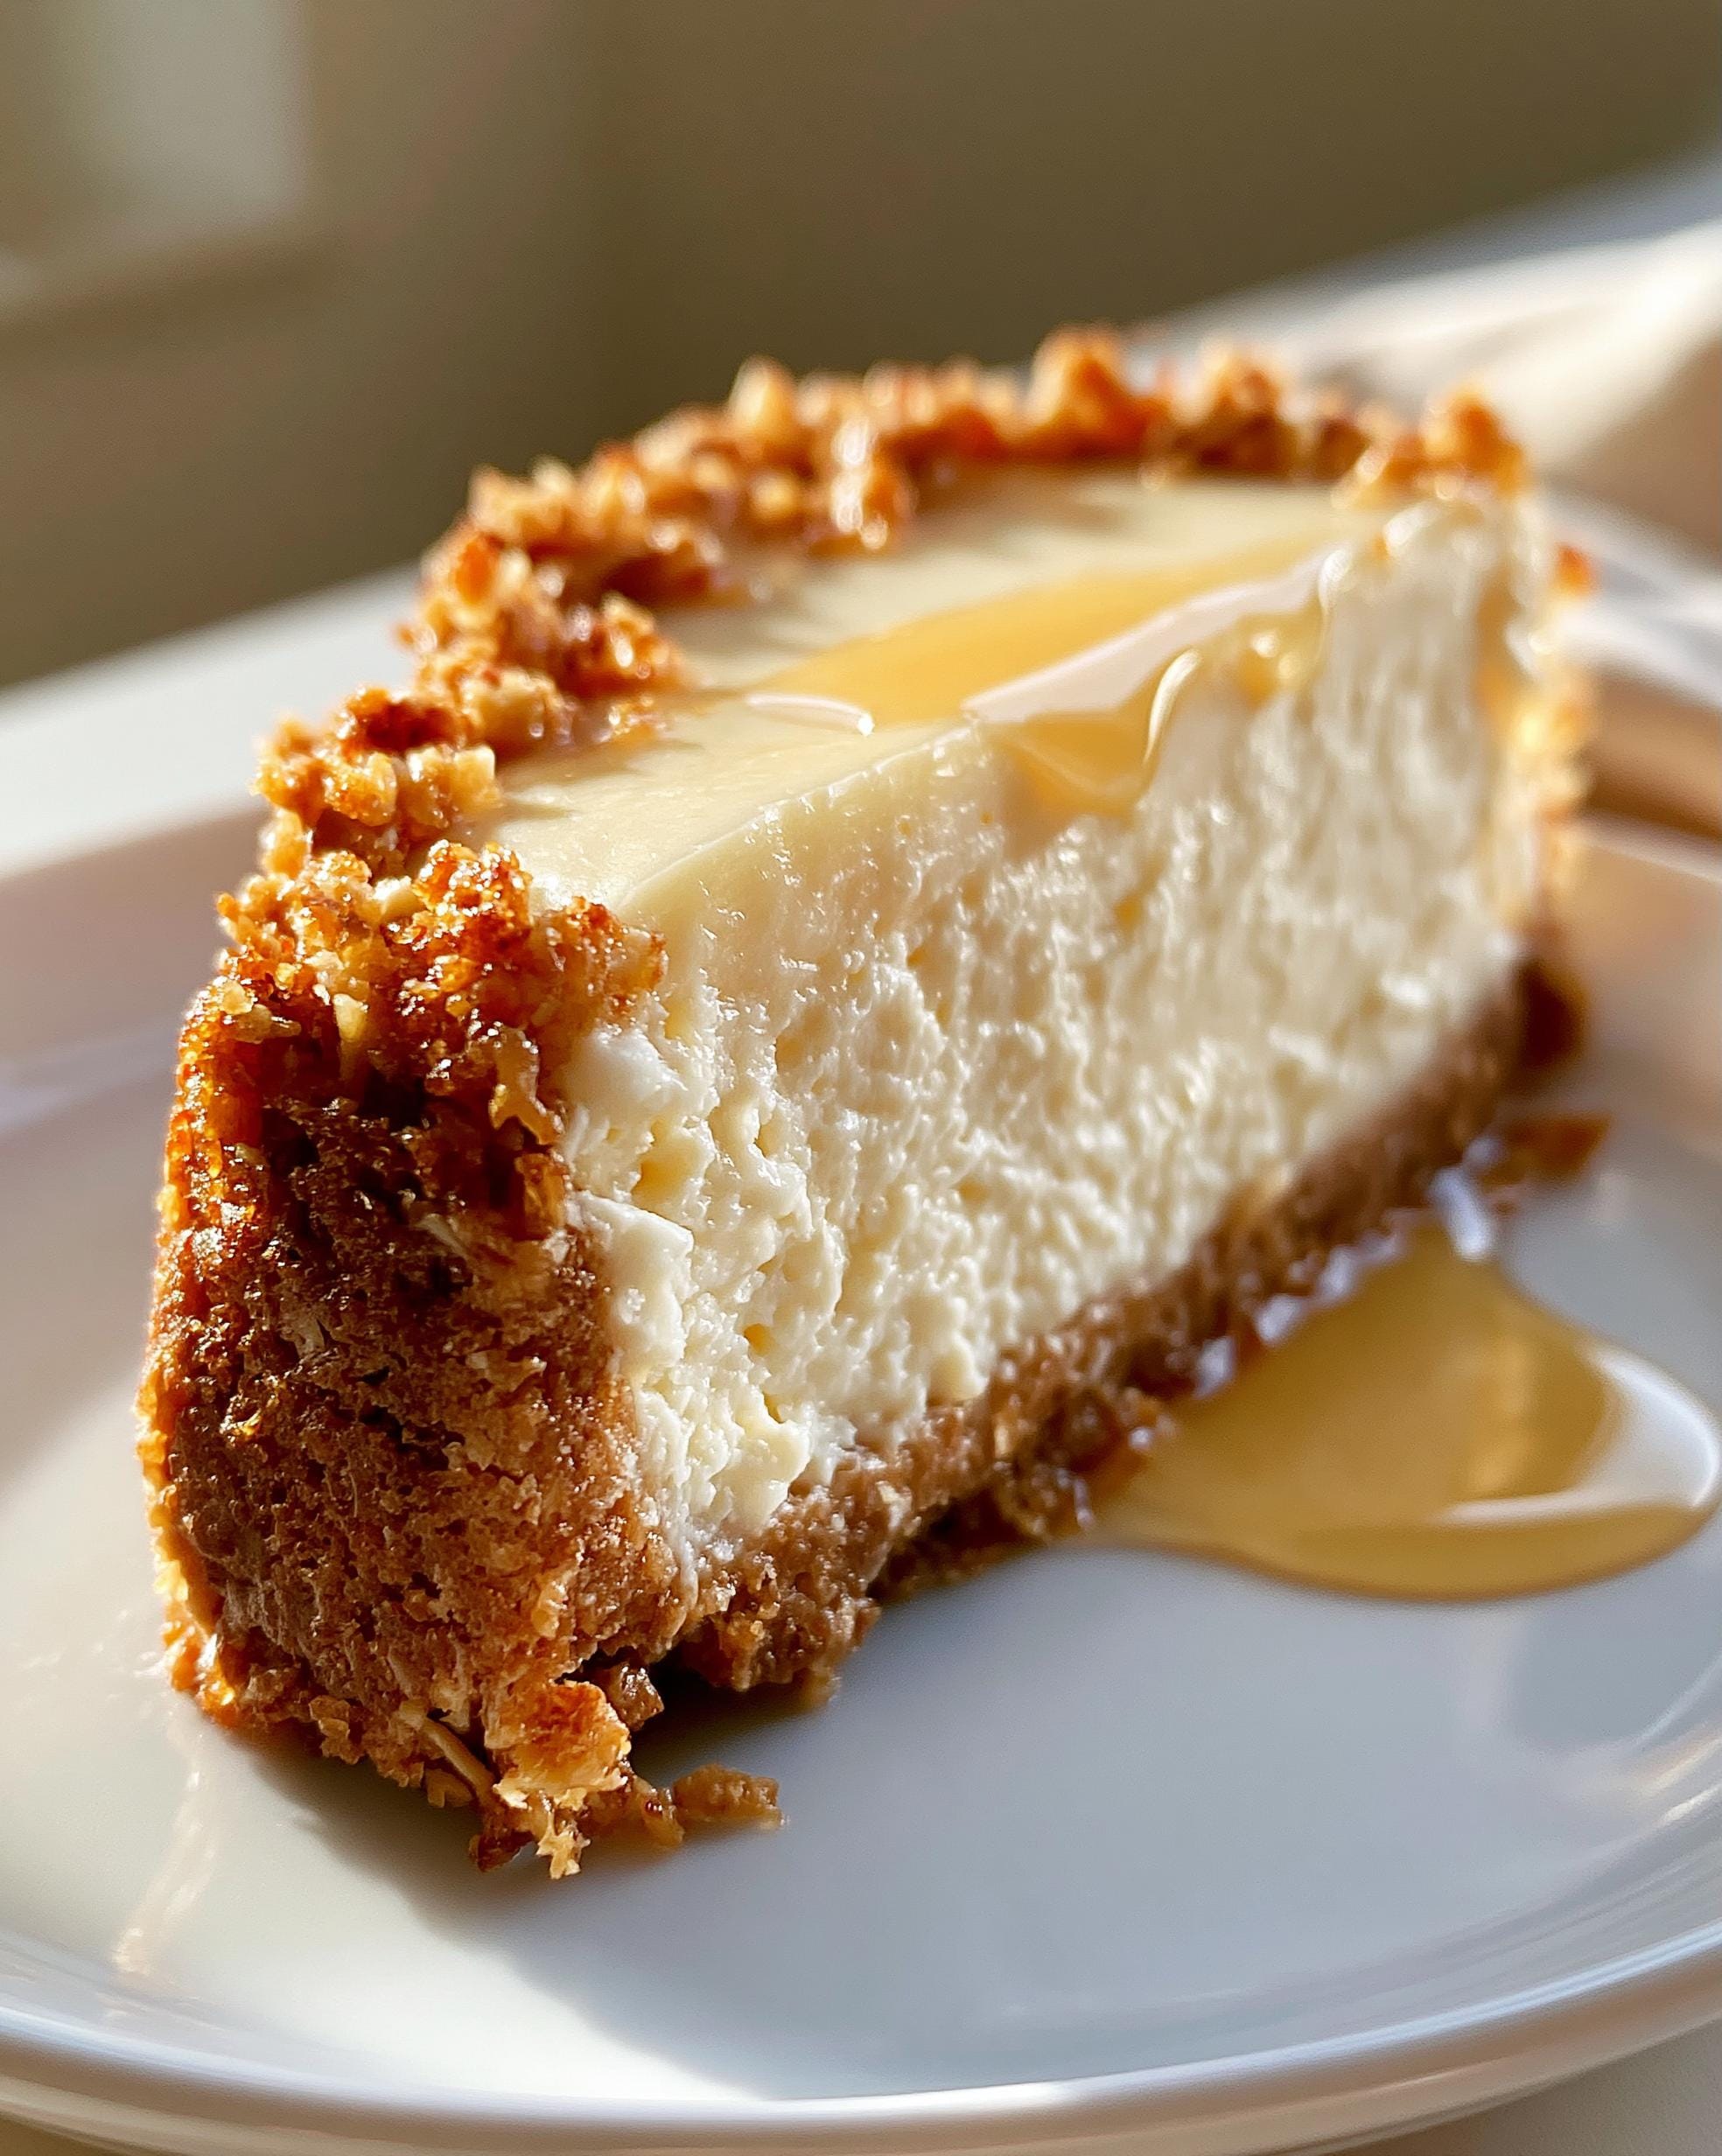
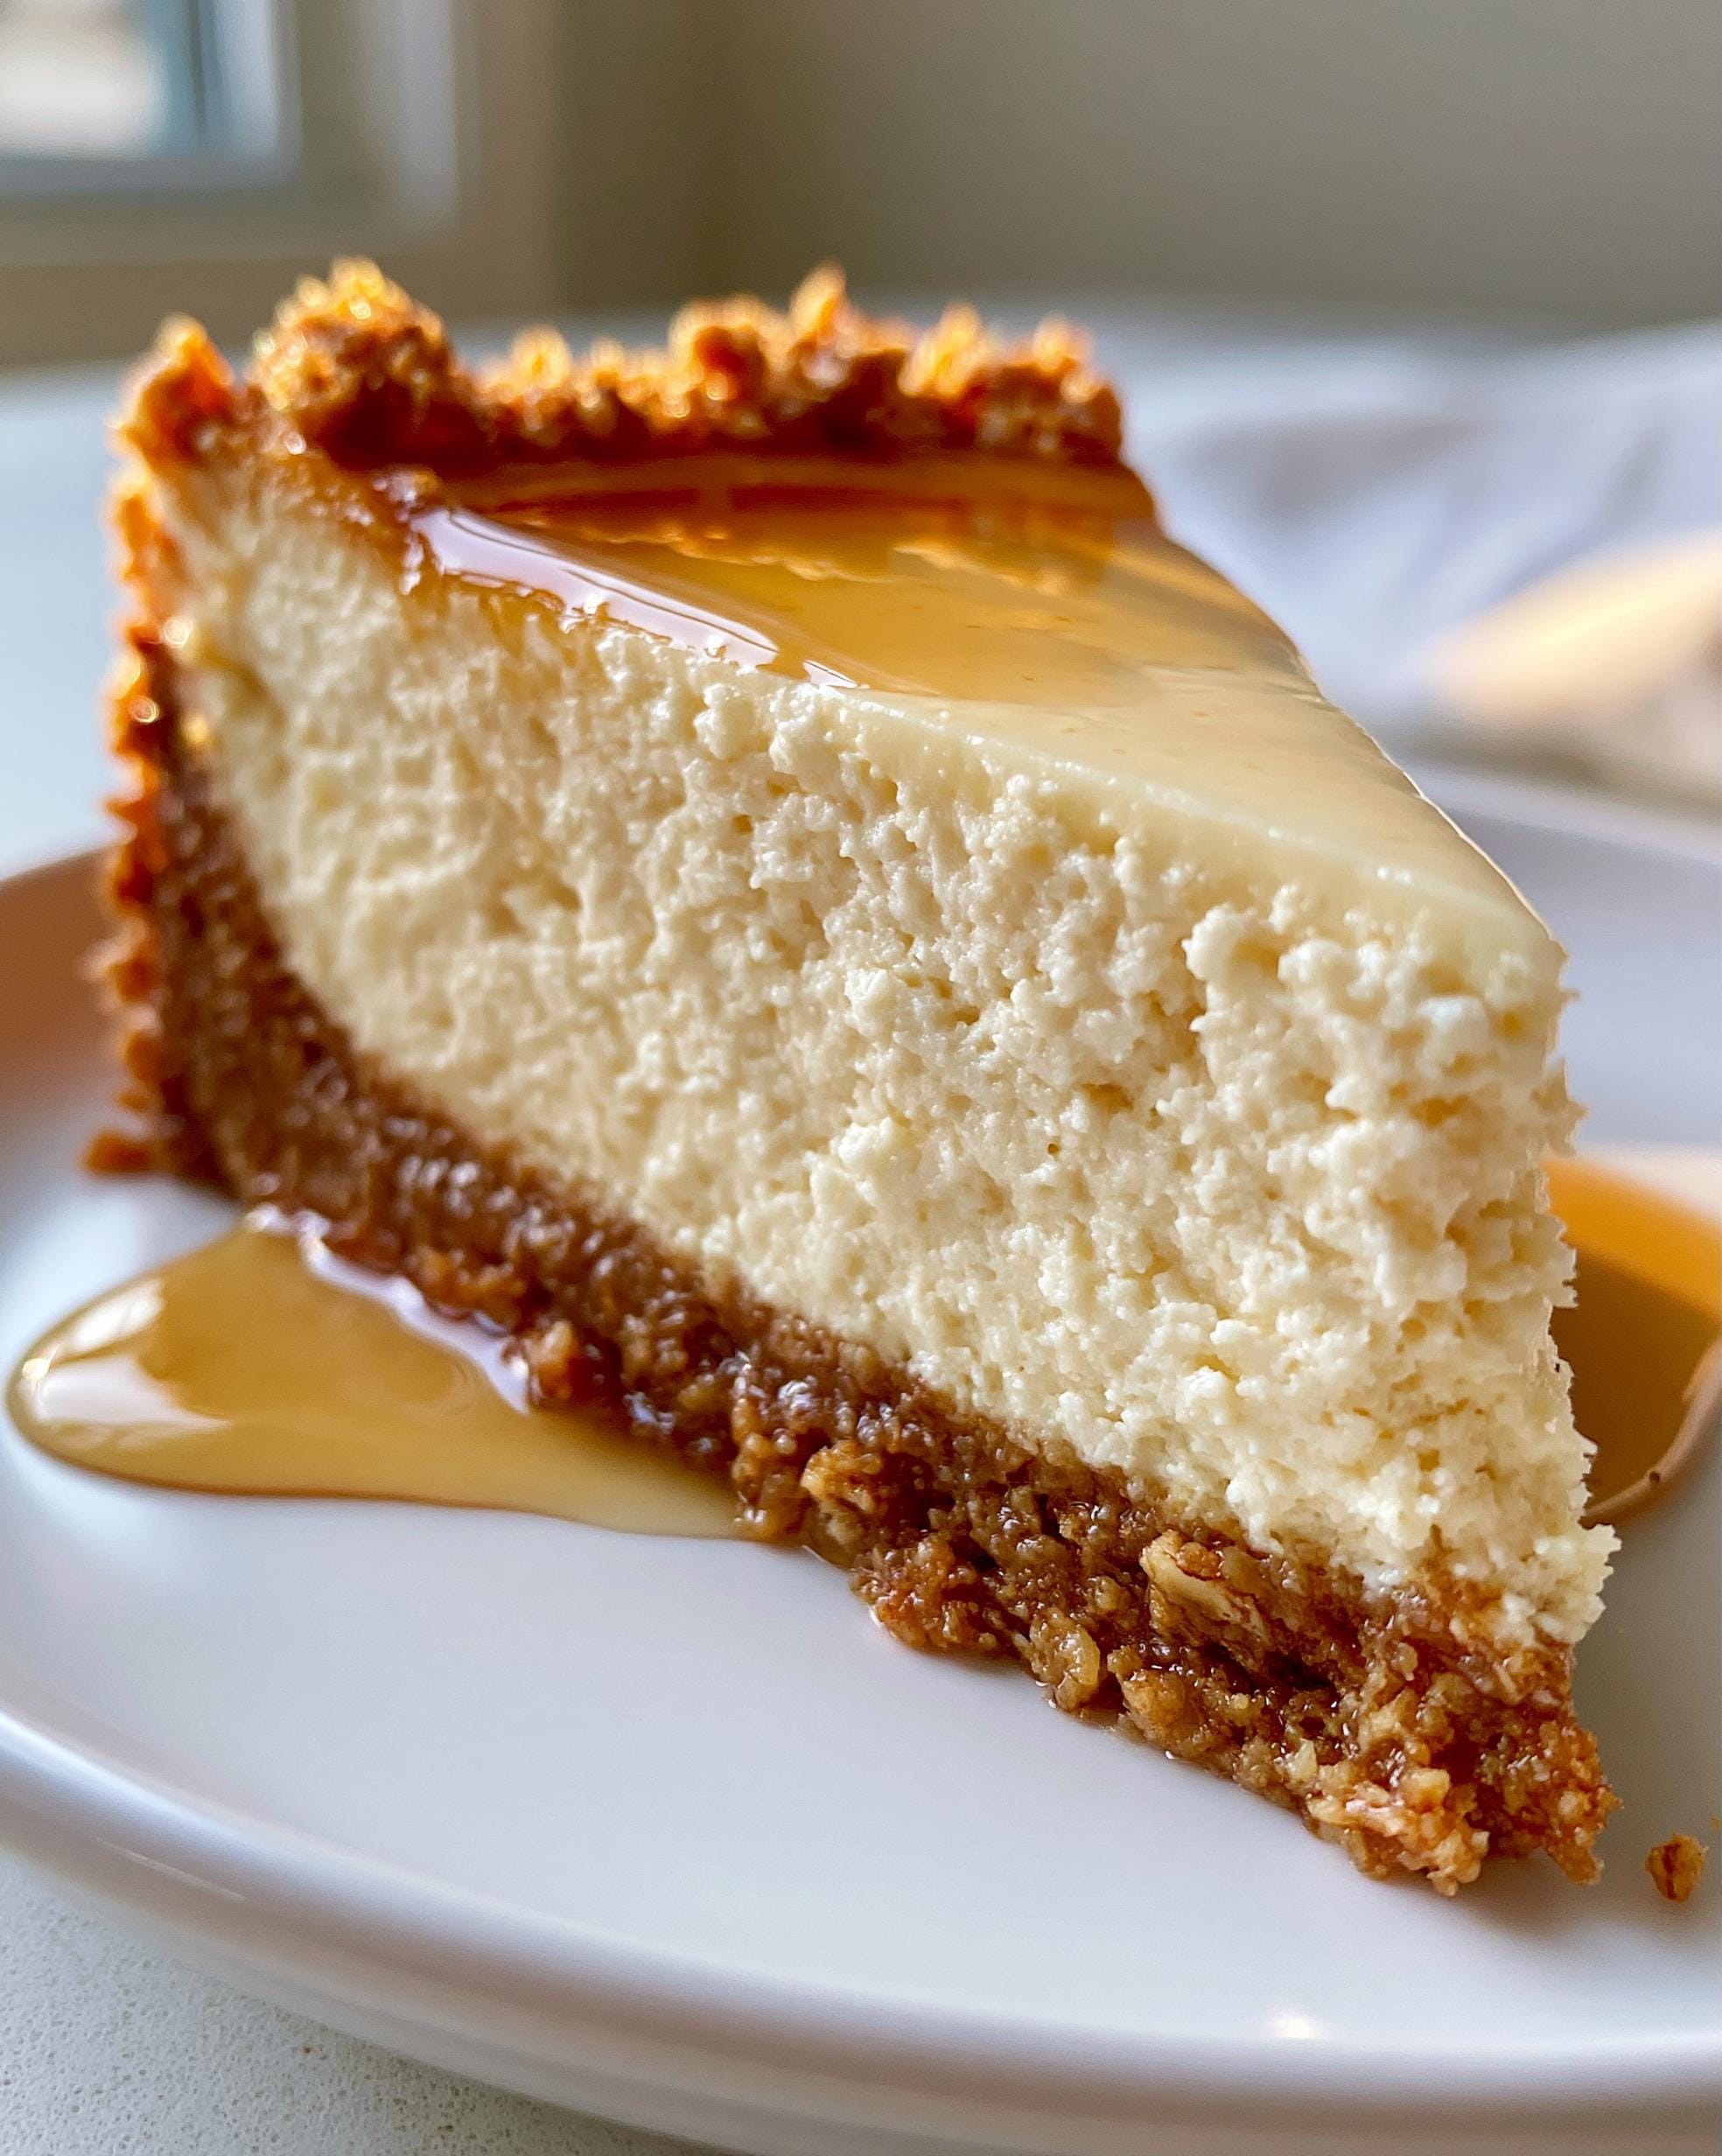
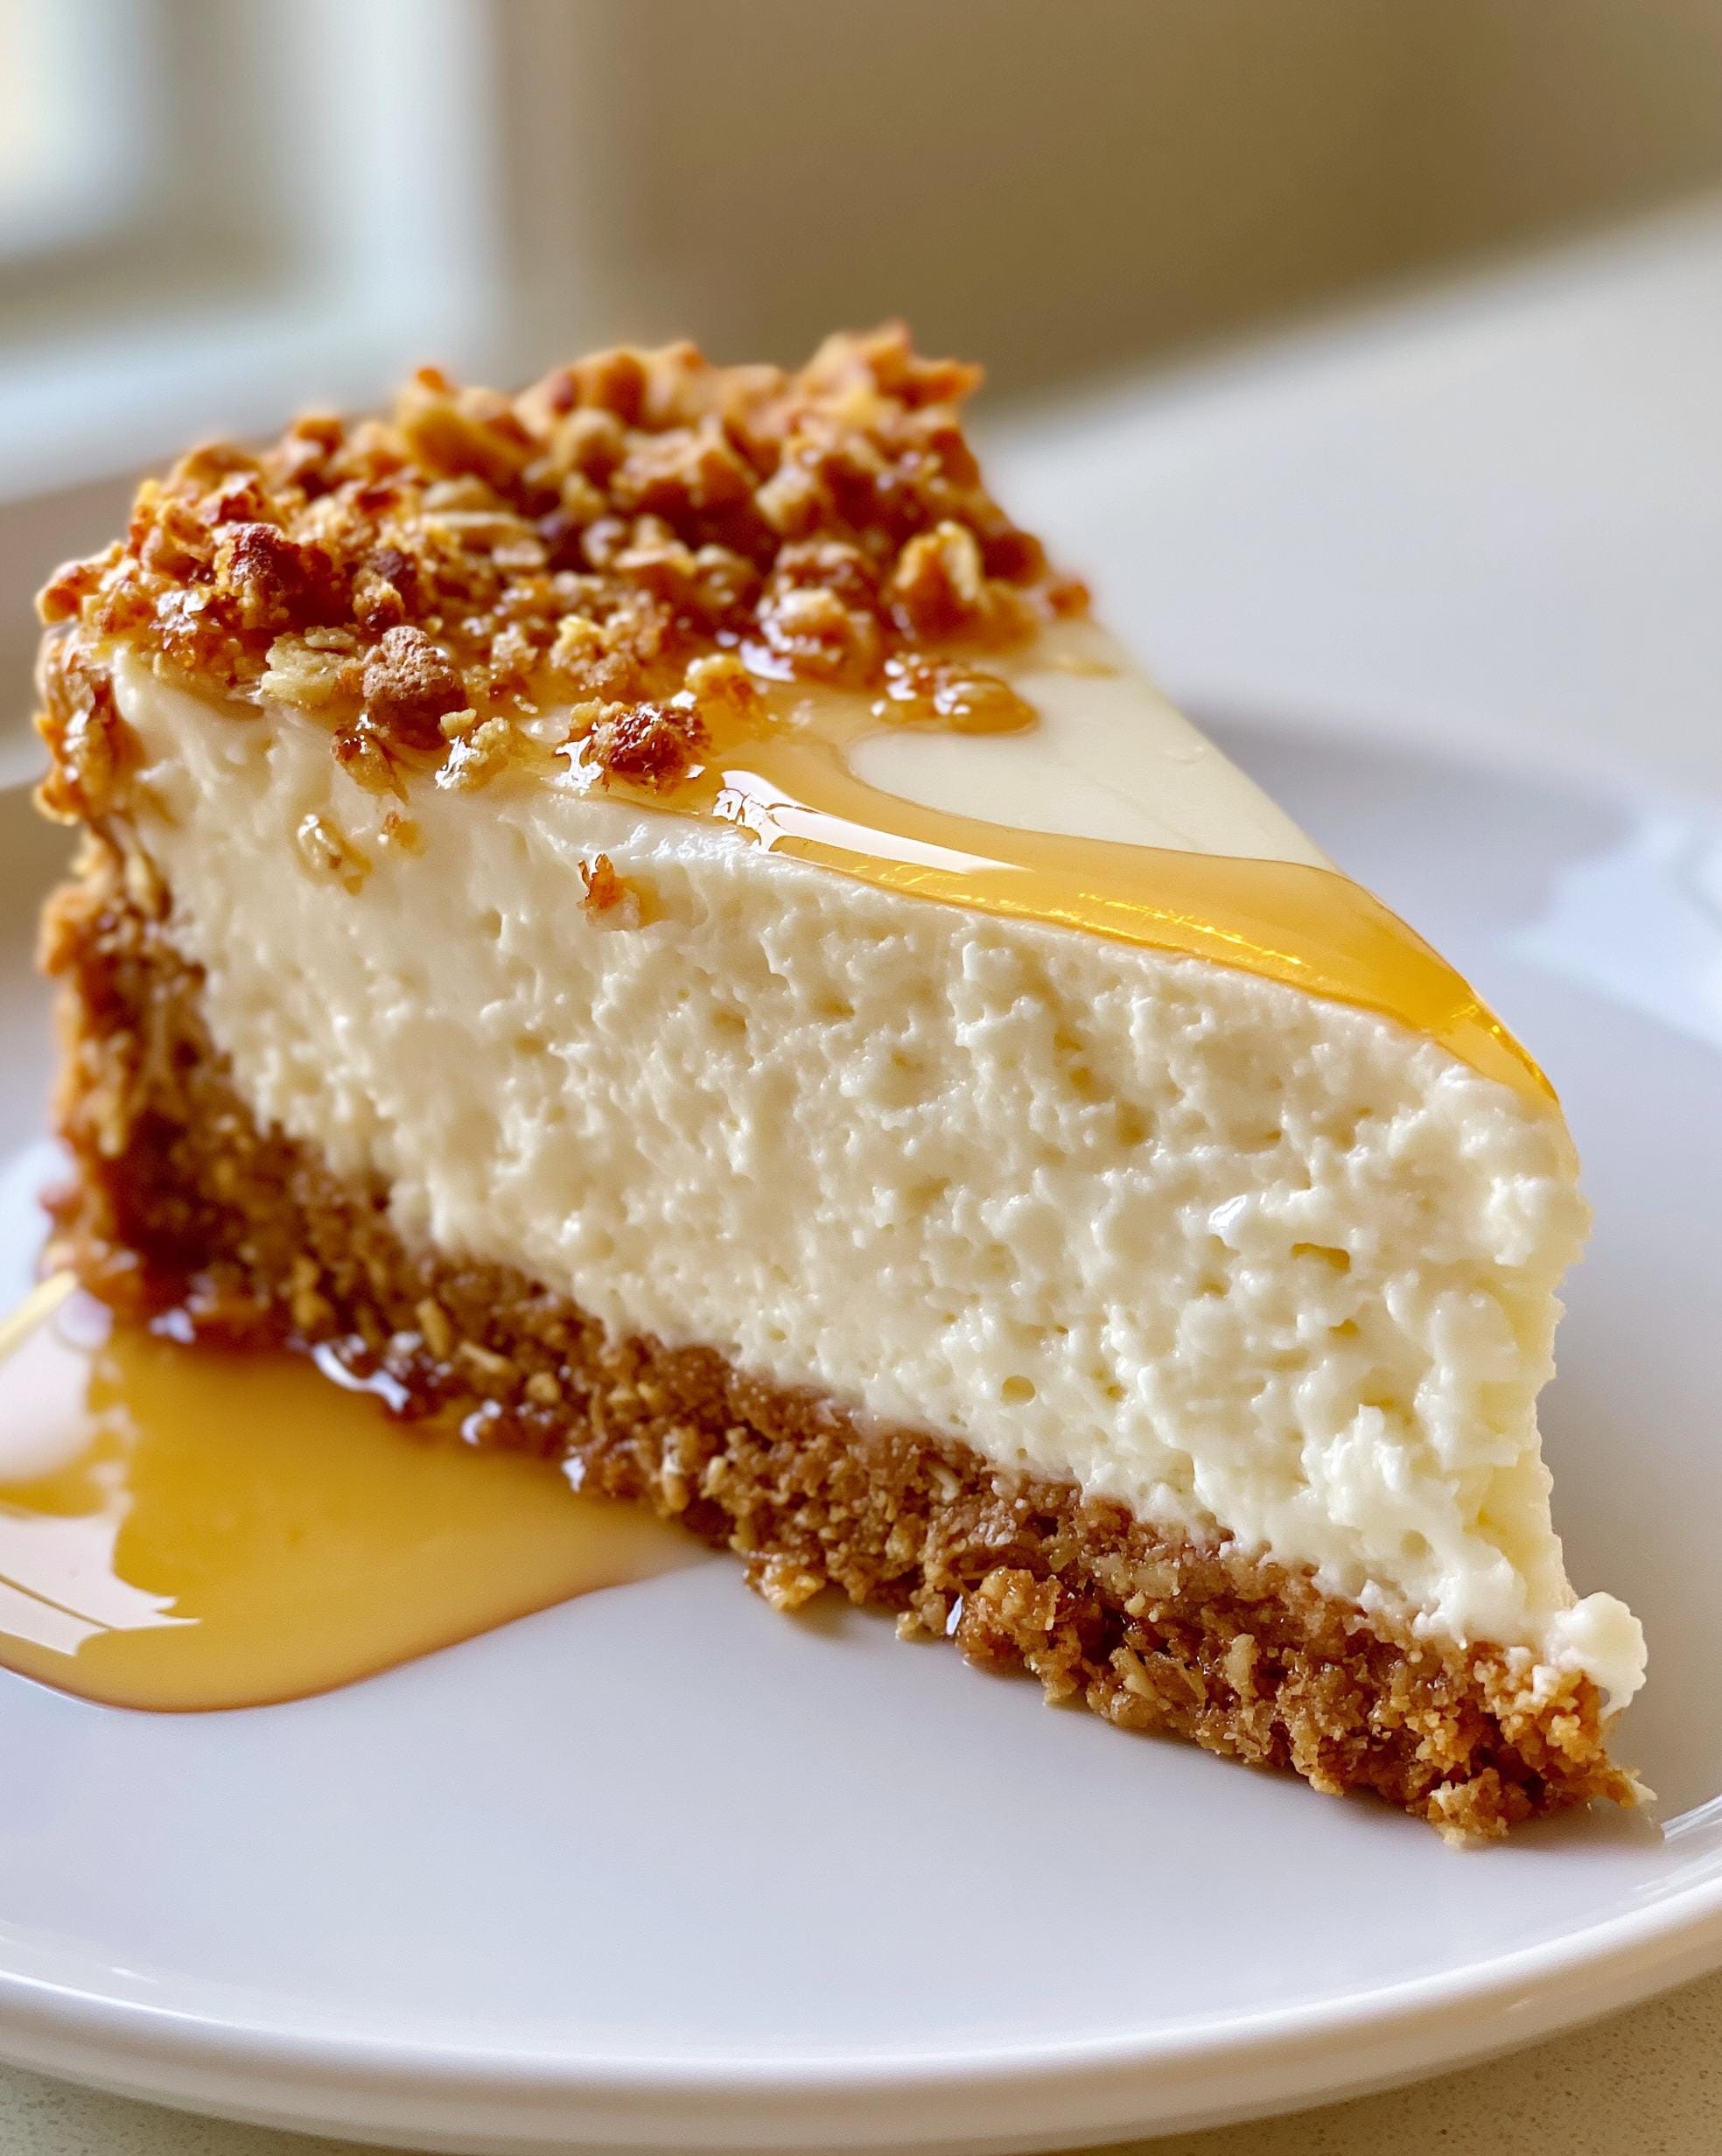
I’ve tried a few different crusts, but this simple oat one is my absolute favorite. It’s sturdy enough to hold the creamy filling and adds a nice, wholesome texture. For the filling, blending until it’s completely smooth is the secret—no one will ever guess there’s cottage cheese in here!
- For the crust:
- 1 cup old fashioned oats (you’ll blend these into coarse crumbs)
- 2 tablespoons honey
- 1 tablespoon melted butter
- For the filling:
- 2 cups low-fat cottage cheese
- 1 cup plain Greek yogurt (I use full-fat for extra creaminess, but low-fat works great too)
- 3 large eggs
- 1/3 cup honey
- 1 teaspoon vanilla extract
- 2 tablespoons cornstarch
- 1 tablespoon lemon juice
How to Make Protein Cheesecake
Don’t be intimidated! I promise this is so much easier than it seems. The key is just taking your time with the blending and the cooling steps. That’s what guarantees that perfect, creamy slice.
Step 1: Start by preheating your oven to 325°F. This is a lower temp than a lot of desserts, but it’s perfect for cooking the cheesecake gently without cracking it. While it’s heating up, lightly grease an 8-inch springform pan. Trust me, you don’t want to skip this part!
Step 2: Let’s make the crust. Toss your old fashioned oats into a food processor and pulse them until they look like coarse sand or breadcrumbs. Pour them into a bowl and mix in the 2 tablespoons of honey and the melted butter. It’ll be a little crumbly, but that’s okay. Dump it all into your prepared pan and press it down firmly and evenly with your fingers or the bottom of a glass.
Step 3: Pop that crust into the oven and bake it for just 8 minutes. This sets it so it doesn’t get soggy. When you take it out, let it cool on the counter for about 10 minutes while you make the filling. Don’t pour the filling onto a hot crust!
Step 4: Now for the magic. Grab your blender. Add in the cottage cheese, Greek yogurt, eggs, the 1/3 cup honey, vanilla, cornstarch, and lemon juice. Here’s my biggest tip: blend it for a full minute, maybe even 90 seconds. You want it completely, utterly smooth—no lumps at all. This is the secret to the creamy texture, just like in my other favorite cottage cheese recipes. Scrape down the sides once to make sure everything gets incorporated.
Step 5: Carefully pour that silky smooth filling over your slightly cooled crust. Gently tap the pan on the counter a couple times to release any air bubbles.
Step panel (Step 6): Now it’s time to bake! Slide the pan into your preheated oven and let it cook for 40 to 45 minutes. You’re looking for the edges to be set, but the very center (about the size of a lemon) should still have a slight jiggle when you gently shake the pan. It shouldn’t look liquidy, just a little wobbly, kind of like my favorite savory cottage cheese bake when it first comes out of the oven.
Step 7: This step is crucial for no cracks! Turn the oven off, crack the door open with a wooden spoon, and let the cheesecake sit in there for 15 minutes. This lets it cool down slowly and gently.
Step 8: Take it out and let it cool completely on your counter. Then, and this is the hardest part, you have to refrigerate it. Cover it and chill for at least 4 hours, but honestly, overnight is best. It firms up perfectly and the flavor just gets better, making it an ideal make-ahead breakfast or dessert for the week. Then slice, serve, and try not to eat the whole thing!
Storing and Serving Your Protein Cheesecake
This cheesecake actually gets better after a day in the fridge, so making it ahead is a total win. Here’s how to keep it perfect.
Once it’s fully chilled, cover it tightly with plastic wrap or store it in an airtight container in the fridge. It’ll stay delicious for up to 5 days. For meal prep, I love slicing it into 8 portions right away and storing them in individual containers. Grab-and-go perfection!
You can also freeze it for up to 2 months. Wrap the whole thing or individual slices tightly in plastic wrap, then foil. Thaw overnight in the fridge before serving.
When you’re ready to eat, I highly recommend topping it with fresh berries, a drizzle of honey, or a little extra dollop of Greek yogurt. It makes it feel extra fancy!
Protein Cheesecake FAQ
I get questions about this recipe all the time! Here are the answers to the ones people ask me most.
Can I use a different sweetener?
Absolutely! Maple syrup works in a 1:1 swap for the honey. The flavor will be a little different—more like a maple cheesecake, which is actually delicious. I find honey gives it that classic, balanced sweetness, but don’t let that stop you from experimenting.
Why is my filling not smooth?
You gotta blend it longer, I promise! Sometimes our blenders need a little extra encouragement. Blend the cottage cheese and yogurt mixture for a full 60-90 seconds, stopping to scrape down the sides once. It should be completely silky with zero graininess before you bake it.
Can I make this without a springform pan?
You can, but a springform makes life so much easier. If you don’t have one, use a regular 8-inch cake pan lined with parchment paper so you can lift the whole cheesecake out. Slicing it in the pan is possible, but it’s definitely a bit more of a challenge.
Nutritional Information for Protein Cheesecake
I always like to be upfront about this stuff. While I track my own macros closely, the exact numbers in your kitchen can vary a bit from mine.
Please consider the nutrition for this protein cheesecake an estimate. The final calories, protein, and sugar can change based on the specific brands of cottage cheese, yogurt, and honey you use, or if you tweak any ingredients. I’ve provided a general idea to help with your goals, but your slice might have slightly different values.
Before You Go
I really hope you give this recipe a try. It’s become such a staple in my house, and I think you’ll love it too.
Let me know how it turns out for you! I’d love to see your creations, so tag me over on Facebook or Pinterest. Happy baking!

Protein Cheesecake
Ingredients
Equipment
Method
- Preheat the oven to 325°F.
- Lightly grease an 8-inch springform pan.
- In a food processor, blend the oats until they resemble coarse crumbs.
- Mix the oats, honey, and melted butter until combined.
- Press the mixture firmly into the bottom of the prepared pan.
- Bake the crust for 8 minutes. Remove and cool slightly.
- Add the cottage cheese, Greek yogurt, eggs, honey, vanilla extract, cornstarch, and lemon juice to a blender.
- Blend until completely smooth.
- Pour the filling over the crust and smooth the top.
- Bake for 40 to 45 minutes until the center is almost set but still slightly jiggly.
- Turn off the oven and leave the cheesecake inside with the door slightly open for 15 minutes.
- Remove from the oven and cool completely.
- Refrigerate for at least 4 hours before slicing and serving.