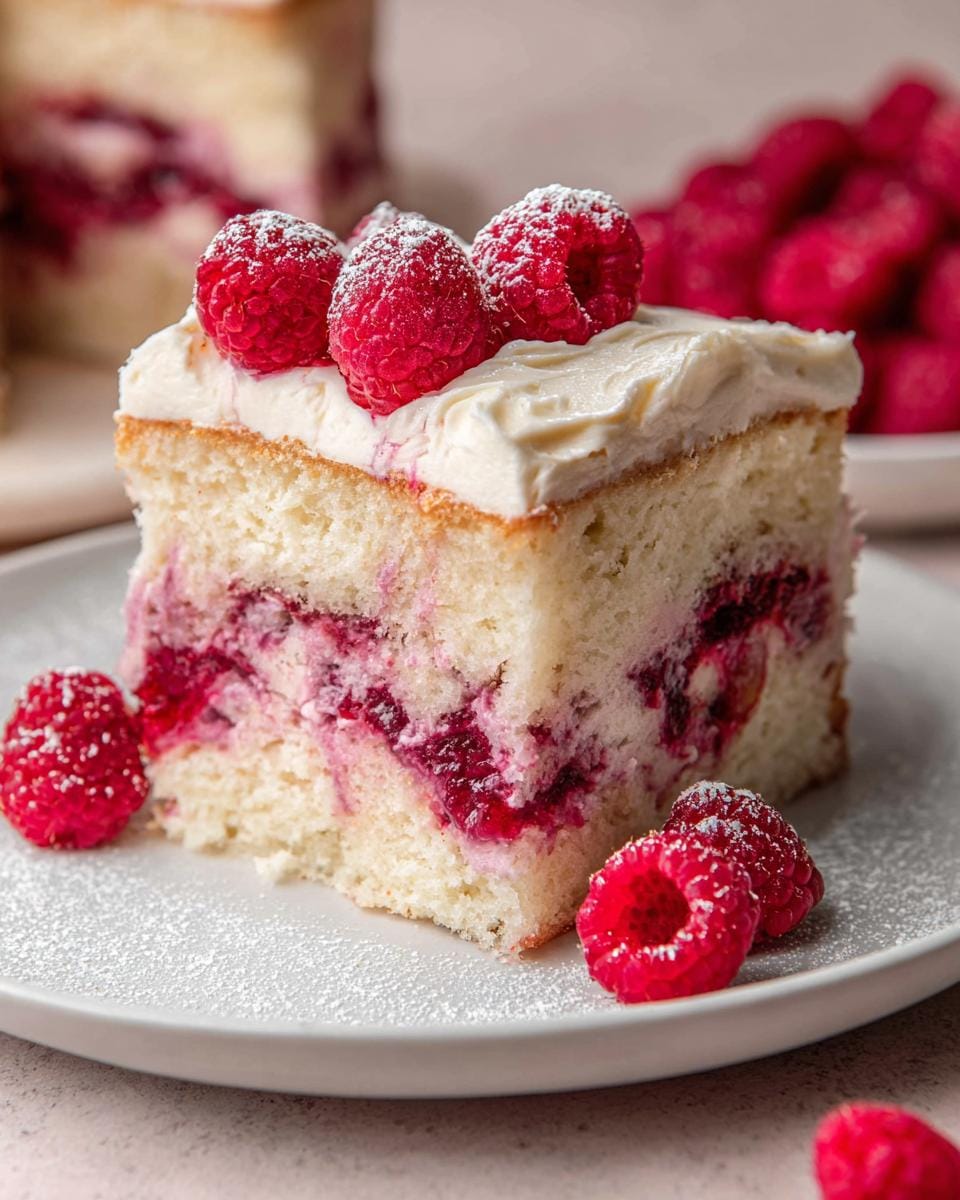
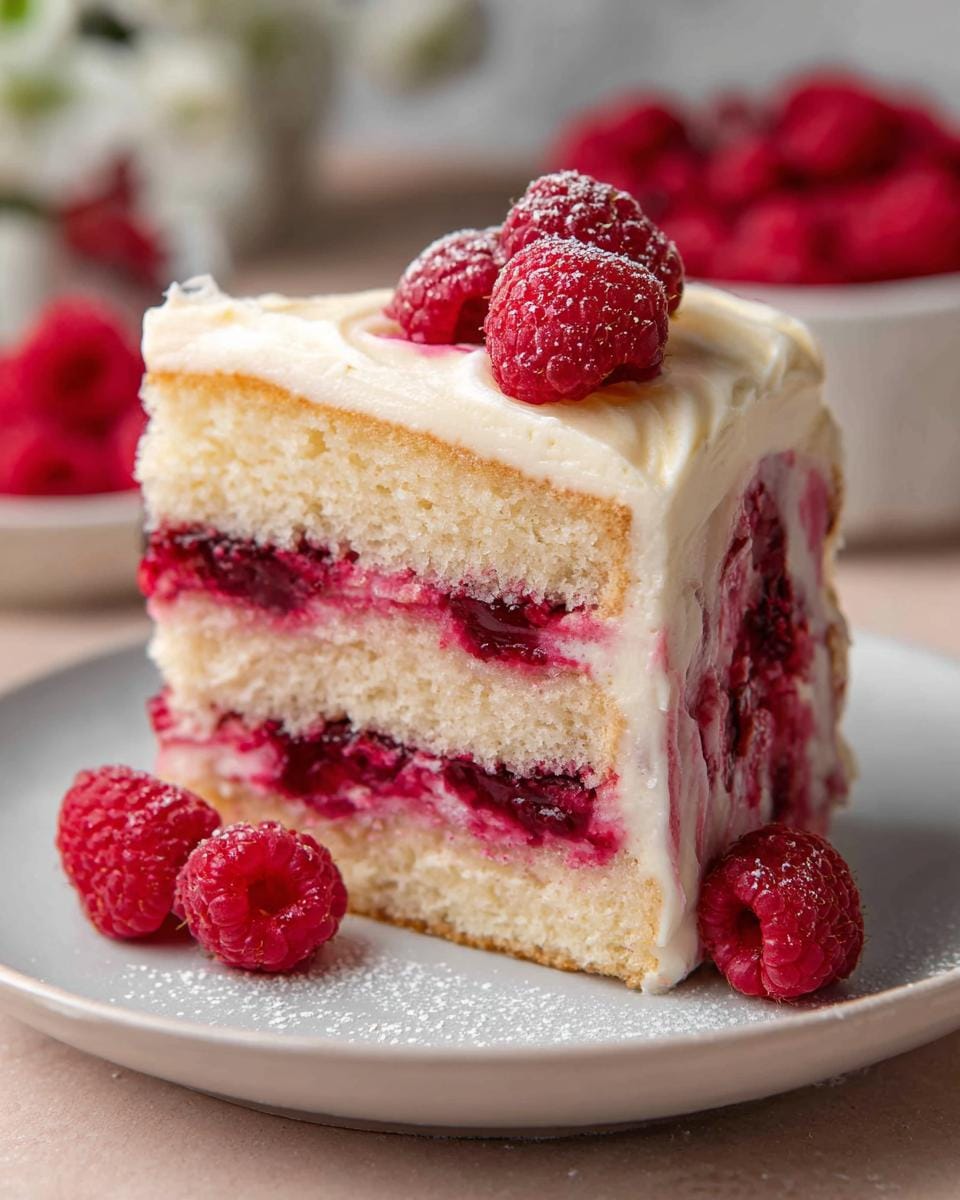
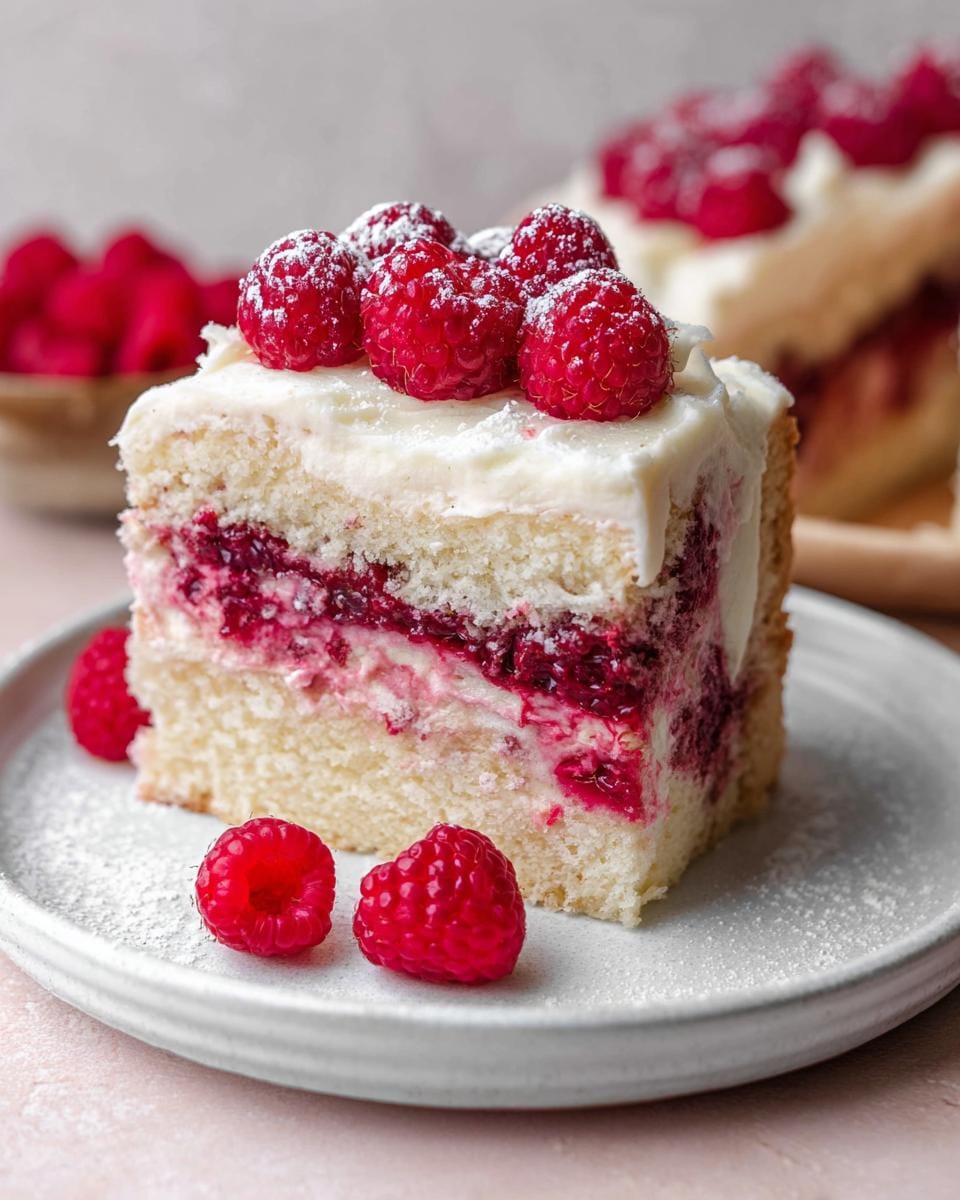
Oh, this White Chocolate Raspberry Cake Soft and Elegant is truly a showstopper! I remember the first time I made it, it was for a friend’s birthday, and the moment it came out of the oven, smelling like pure heaven, I knew it was special. It’s that perfect combination of a super soft, tender cake that just melts in your mouth, swirled with bright, tangy raspberry, and then all wrapped up in this dreamy white chocolate frosting. It’s honestly the kind of cake you see on Pinterest and think, “Wow, that looks impossible to make,” but trust me, it’s totally doable and so worth it!
Why You’ll Love This White Chocolate Raspberry Cake
- It’s unbelievably soft and tender, just like you’d get from a fancy bakery!
- The flavor combo of sweet white chocolate and tangy raspberries is pure magic.
- It looks so elegant, making it perfect for birthdays, holidays, or just because.
- The milk soak adds an extra layer of moisture that you’ll totally swoon over.
- It’s simple enough for a weekend bake but impressive enough for guests.
Ingredients for Your White Chocolate Raspberry Cake
- For the raspberry jam
- 3 cups frozen raspberries
- 3/4 cup granulated sugar
- 2 teaspoons cornstarch
- For the white cake
- 2 1/2 cups cake flour
- 1 1/2 teaspoons baking powder
- 1/4 teaspoon baking soda
- 1/2 teaspoon salt
- 10 tablespoons unsalted butter, softened
- 1 1/2 cups granulated sugar
- 4 large egg whites, room temperature
- 1 tablespoon vanilla flavoring
- 1 cup buttermilk, room temperature
- For the milk soak
- 1/3 cup whole milk
- 1/3 cup sweetened condensed milk
- 1/2 tablespoon vanilla flavoring
- For the frosting
- 1 cup unsalted butter, softened
- 4 ounces cream cheese, chilled
- 6 ounces white chocolate, melted and cooled
- 1 1/2 cups powdered sugar
- 1/4 cup raspberry jam
- For garnish
- 2 tablespoons raspberry jam
Crafting Your White Chocolate Raspberry Cake Soft and Elegant
Step 1: Alright, let’s get this masterpiece started! First, we need to whip up that gorgeous raspberry jam. Toss the frozen raspberries into a saucepan over medium heat. Let them bubble and break down a bit, then stir in your sugar and cornstarch. Keep simmering until it thickens up nicely – you want it jammy, not runny! Pour it into a bowl and let it cool completely. This is key for the next steps!
Step 2: Time to get the oven going! Preheat it to 350°F (175°C). Grab your 9×9 inch pan and line it with parchment paper. This makes sure your cake doesn’t stick, and cleanup is a breeze. Trust me, nobody likes scrubbing pans!
Step 3: In a medium bowl, whisk together your cake flour, baking powder, baking soda, and salt. This dry mix ensures everything gets evenly distributed in the batter, giving you that perfect cake structure.
Step 4: Now for the wet ingredients! In a separate, larger bowl, beat your softened unsalted butter and granulated sugar together until they’re super light and fluffy. This usually takes about 2 minutes with a mixer. Don’t skimp on this; it’s what makes the cake tender!
Step 5: Slowly add in your room-temperature egg whites and that lovely vanilla flavoring, mixing until everything looks smooth and a bit pale yellow. It should be looking really creamy now!
Step 6: This is where the magic happens for that super soft texture. Alternate adding your dry ingredients (from Step 3) and the room-temperature buttermilk into the butter mixture. Mix gently until *just* combined. Overmixing can make the cake tough, so easy does it!
Step 7: Pour all that beautiful batter into your prepared pan. Bake for about 35 to 40 minutes. You’ll know it’s done when a toothpick inserted right into the center comes out clean. No wet batter clinging to it!
Step 8: Let the cake cool completely in the pan. Once it’s cool to the touch, carefully poke small holes all over the surface. Don’t be shy here; the more holes, the more soak it’ll get!
Step 9: Whisk together the whole milk, sweetened condensed milk, and that splash of vanilla. Slowly, oh so slowly, pour this glorious mixture over the entire cake, letting it soak into all those little holes you made. It’s going to look like a lot, but the cake will drink it right up, making it incredibly moist!
Step 10: Now, spread that cooled raspberry jam evenly over the top of the cake, letting it settle into those holes. It’s going to look gorgeous already! You can get inspired with beautiful cake designs on Pinterest.
Step 11: For the frosting, beat your softened butter in a bowl until it’s nice and fluffy. Then, add in the chilled cream cheese and mix until it’s smooth as silk. Seriously, no lumps!
Step 12: Gently blend in your melted (and cooled!) white chocolate, then add the powdered sugar and the remaining raspberry jam. Mix it all up until you have this light, creamy, dreamy frosting. It’s going to smell amazing!
Step 13: Spread the frosting evenly over the top of the cake. Then, take a spoon and swirl in some extra raspberry jam on top for that beautiful marbled effect you’ve seen. It looks so elegant!
Step 14: Let the cake set for a bit before you slice into it – maybe pop it in the fridge for 30 minutes if you can’t wait. Then, slice it up and serve! Enjoy that perfect bite of soft cake, tangy jam, and creamy frosting. For more baking tips from me, check out my author page!
Serving Suggestions for Your Elegant Cake
This cake is wonderful on its own, but here are a few ideas to make it even more special:
A Small Scoop of Vanilla Bean Ice Cream: The classic vanilla really lets the raspberry and white chocolate shine. It’s such a simple but perfect pairing!
Fresh Raspberries and a Dusting of Powdered Sugar: A little extra fresh fruit and a sprinkle of powdered sugar make it look extra pretty and add a nice textural contrast.
A Dollop of Whipped Cream: Lightly sweetened whipped cream adds a touch of airy indulgence that is just divine with this cake. For more dessert ideas, check out my high-protein breakfast recipes!
Storing and Reheating Your White Chocolate Raspberry Cake
Okay, so you’ve made this absolutely gorgeous White Chocolate Raspberry Cake, and you want it to stay perfect, right? Store any leftovers in an airtight container in the fridge. Honestly, it’s best kept that way because of the cream cheese in the frosting to be safe, and it’ll be good for about 3-4 days. You don’t really need to reheat it, but if you just can’t stand it cold, a few seconds in the microwave *might* work, but I usually just let it come to room temp on the counter for about 20 minutes before digging in. This cake is also fantastic for meal prep, as it holds up really well!
Here’s a little trick for meal prep: bake it one day, soak it and frost it the next. That way, everything has time to meld together. You can find more easy recipes like this on my site!
Frequently Asked Questions about White Chocolate Raspberry Cake
Q: Can I use fresh raspberries instead of frozen for the jam?
Absolutely! If you use fresh raspberries, you might need a little less cooking time to break them down. Just make sure to still mash them well before adding the sugar and cornstarch. It’s all about getting that thick, delicious jammy consistency for your White Chocolate Raspberry Cake.
Q: My frosting seems a little thin, what did I do wrong?
Don’t worry! If your frosting is a bit thin, it usually means the butter or cream cheese was too soft, or the white chocolate wasn’t cooled enough. Try popping it in the fridge for about 15-20 minutes to firm up. Sometimes adding a little extra powdered sugar can help too, but do it a tablespoon at a time! This cake is forgiving, so no stress!
Q: How do I make this cake for a larger crowd?
You can easily double this recipe to fit into a larger 9×13 inch pan. You might need to adjust the baking time slightly, so keep an eye on it – start checking for doneness around the 40-minute mark. And for more information on special diets, check out my disclaimer page.
Before You Go
I really hope you give this White Chocolate Raspberry Cake Soft and Elegant a try! It’s such a joy to make and even better to eat. Don’t forget to leave a comment below and let me know how yours turned out, or share your photos – I absolutely love seeing your creations! For more about me, feel free to check out my About page!
White Chocolate Raspberry Cake
Ingredients
Equipment
Method
- In a saucepan over medium heat, cook raspberries until broken down, then stir in sugar and cornstarch and simmer until thickened. Cool completely.
- Preheat oven to 350 degrees Fahrenheit and prepare a 9 by 9 inch pan with parchment.
- In a bowl, whisk together cake flour, baking powder, baking soda, and salt.
- In a separate bowl, beat butter and sugar until light and fluffy, about 2 minutes.
- Add egg whites and vanilla flavoring, mixing until smooth and pale.
- Alternate adding dry ingredients and buttermilk, mixing gently until just combined.
- Pour batter into the pan and bake for 35 to 40 minutes until a toothpick inserted in the center comes out clean.
- Cool the cake completely, then poke small holes across the surface.
- Whisk together milk, sweetened condensed milk, and vanilla, then slowly pour over the cake allowing it to absorb fully.
- Spread a layer of raspberry jam over the cake, letting it seep into the holes.
- Beat butter until fluffy, then add cream cheese and mix until smooth.
- Blend in melted white chocolate, then powdered sugar and raspberry jam until light and creamy.
- Spread frosting evenly over the cake and swirl extra raspberry jam on top.
- Slice and serve once fully set.